

Statuario Marble Shower Walls before Niches, Corners, and Warm Light
The warehouse argument starts when a beautiful dry-lay is compared with a disappointing installed wall. The dry-lay showed four uninterrupted panels. The shower now has a niche, mixer, pipe opening, inside corner, glass fixing, and sloped shelf breaking that composition. Nobody approved the wall with those interruptions visible.
The installer cannot restore stone that the layout removed. Nor can grout or sealant repair a vein that changes direction because the return pieces came from random offcuts. That slab doesn’t belong next to your bathtub, and an unplanned fragment does not belong at the center of a shower.
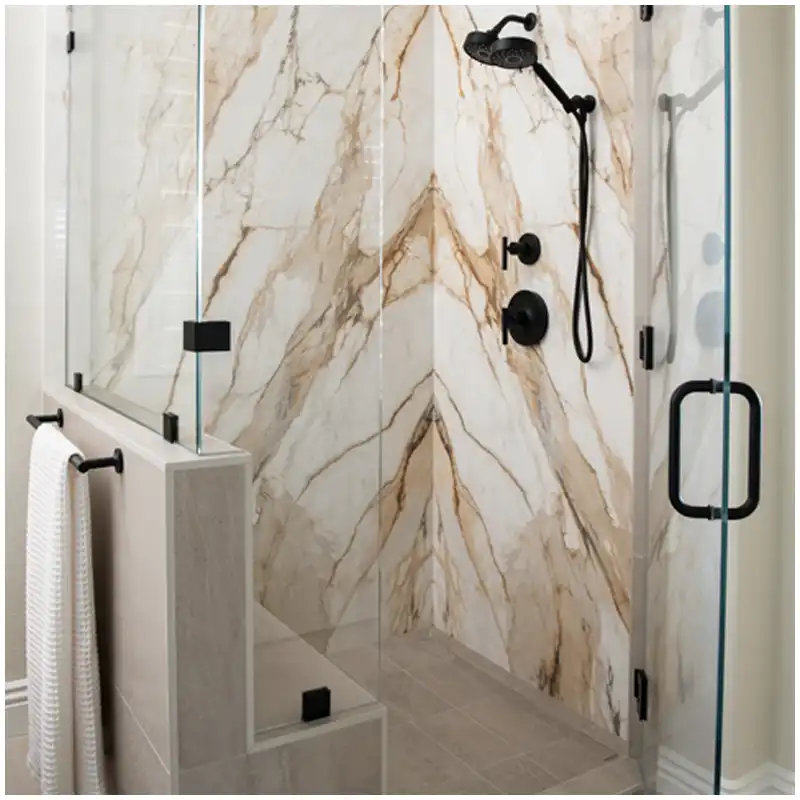
I approve Statuario marble shower walls as complete elevations. The actual slab images sit behind panel joints, niches, fittings, corners, shelf pieces, floor line, ceiling line, and viewing direction. Then the stone and wet-area teams can see what each decision does.
Shower Wall Review
Build the Full Elevation
Resolve Niches and Shelves
Turn Corners Deliberately
Coordinate the Wet-Area Assembly
Inspect Light and Finish
Dry-Lay, Pack, and Install
Draw Statuario Marble Shower Walls as Installed Elevations
Start with verified wall dimensions, datum, floor and ceiling finish, substrate, waterproofing build-up, panel thickness, joint width, corner type, niche, bench, curb, opening, plumbing trim, glass interface, movement joints, and installation method. State which dimensions are verified and which remain nominal.
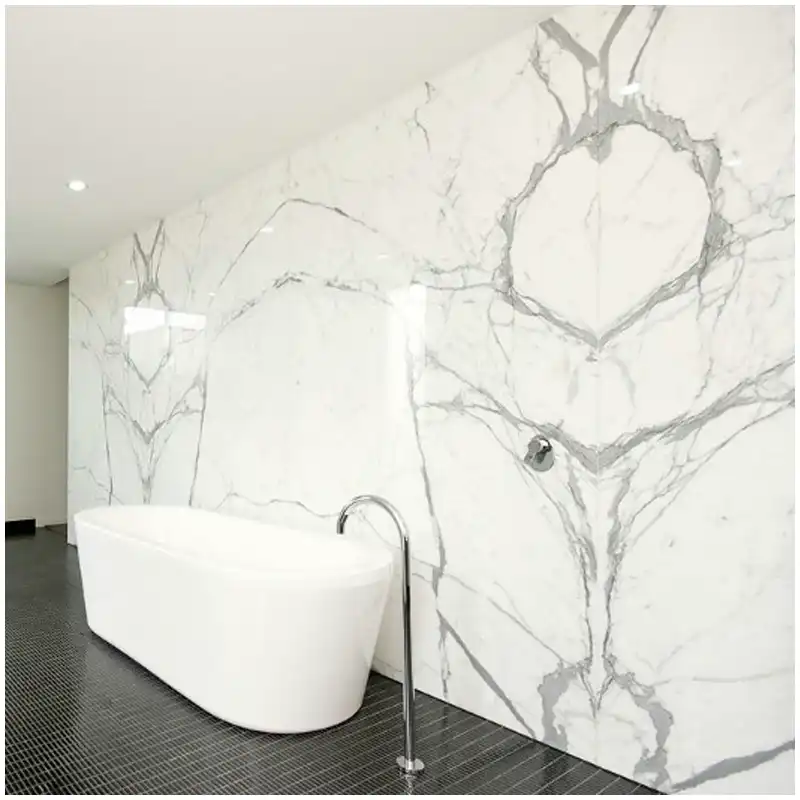
The new Statuario Marble Slabs for Bathroom Projects page establishes the actual-lot range, lighting, finish, repairs, and use zones. Use that approval here. A shower layout should not quietly widen the accepted shade range to improve cutting yield.
Give every panel and return a unique code. Mark finished face, top direction, slab number, vein direction, joint neighbor, edge, holes, slots, and crate. The code must survive dry-lay, inspection, packing, and site installation.
Par Statuario marble shower walls, view the elevation from the bathroom entrance and from inside the shower. A central vein may feel balanced from the doorway and uncomfortably close when standing at the controls. Use both views before approval.
Decide whether the principal movement flows horizontally, vertically, diagonally, mirrors, or stops. Statuario does not need perfect bookmatching to look controlled. It does need intentional relationships at eye-level joints and major corners.
| Shower detail | Stone layout record | Wet-area coordination | Warehouse hold point |
|---|---|---|---|
| Panel joint | Code, width, vein transition, edge finish | Substrate joint and movement requirement | Joint splits a focal vein or repair |
| Niche | Back, jambs, head, sill, edges, continuation | Waterproofing and positive shelf slope | Random return or flat shelf |
| Inside corner | Panel order, return, joint, vein decision | Movement and sealant detail | Two elevations approved separately |
| Mixer and pipe holes | Centers, diameters, templates, vein and repair position | Sealing and service access | Hole cuts a fissure or leaves thin bridge |
| Base and curb | Bottom edge, floor joint, curb tops and returns | Drainage, waterproofing, slope, movement | Water trap or mismatched visible edge |
The stone record and wet-area record must meet, but they are not the same document. The warehouse can verify panels and returns. The responsible designer and installer must define and verify the complete waterproofed assembly under applicable standards and product instructions.
Cut the Niche into the Slab Layout before Production
A niche removes a rectangle from the main wall and introduces at least five visible surfaces: back, two jambs, head, and sill. It may also introduce miters, exposed thickness, joints, and a lighting strip. Treat it as a small room, not a hole.
On Statuario marble shower walls, a niche can interrupt the only strong vein. Try alternate locations or slab placements before accepting the break. If the design wants the movement to continue through the back, reserve the related zone and mark orientation.
Sill or shelf pieces require positive drainage toward the shower according to the approved wet-area design. A visually level stone shelf can hold water if the assembly lacks slope. The drawing should distinguish structural or waterproofing slope from the finished stone dimension.
Miters can create a clean monolithic niche, but they expose thin edges during fabrication, packing, and installation. Butt joints show material thickness and may be easier to service. Approve the detail on actual material and protect each return as its own coded piece.
Keep strong fissures, resin repairs, and cloudy patches away from narrow niche returns where practical. A natural feature accepted on a broad wall may dominate a 70 mm jamb. Scale changes acceptance.
Coordinate lights inside the niche
An integrated light creates severe raking conditions across the back and shelf. It can reveal uneven polish, resin, scratches, fill, lippage, and water marks. Inspect the niche assembly under a similar direction and color temperature before packing.
Do not let a lighting channel or cable route appear after stone cutting. Coordinate recesses, profiles, drivers, access, waterproofing, heat, and service with qualified professionals and the product instructions. The stone drawing should reflect the approved interface.
Treat Every Corner as a Joined Composition
Inside corners bring two elevations together. If each wall is approved alone, one may end with a heavy diagonal line while the next begins with calm white. The joint is technically clean and visually abrupt.
A Statuario marble shower walls dry-lay should place visible corner panels side by side in their installed orientation. Decide whether movement turns, stops, mirrors, or changes. Mark the final order and joint width.
Outside corners, curbs, and partition ends add touch and impact exposure. Choose miter, quirk miter, laminated edge, butt return, or another approved detail based on design, material condition, fabrication, use, and installation. Inspect the edge under side light.
Corner sealant and movement details belong with the wet-area designer and installer. Do not rigidly fill a location that requires movement accommodation. Stone edges should be prepared to suit the approved joint system.
The Hard-Won Lesson: Approve the niche and corner at full scale
A main wall dry-lay can pass with a calm, continuous field, while the coded niche returns remain offcuts and the adjacent corner wall is reviewed on another day. Once installed, the niche looks patched and the vein turns into a blank panel at the corner. Every individual piece met its range.
The Lesson: Join the wall, niche, and visible corner in one approval image before any return edge is cut.
Keep Stone Approval Connected to the Shower Assembly
White marble is not the waterproofing layer. The approved assembly must address substrate, waterproofing, penetrations, corners, movement, drainage, slopes, adhesive or fixing, joints, sealant, compatibility, curing, and testing. Follow the responsible designer’s details, applicable standards, and manufacturer instructions.
Par Statuario marble shower walls, adhesive and setting materials can affect appearance, especially where the stone has some translucency or variable thickness. Use compatible, specified materials and conduct mock-ups when appearance risk exists. Do not assume a dark substrate will disappear behind white stone.
Penetrations for mixers, shower arms, body sprays, rails, glass, and accessories must match approved templates and sealing details. Keep holes away from vulnerable veins or repaired zones where practical. Inspect edge quality and identification before packing.
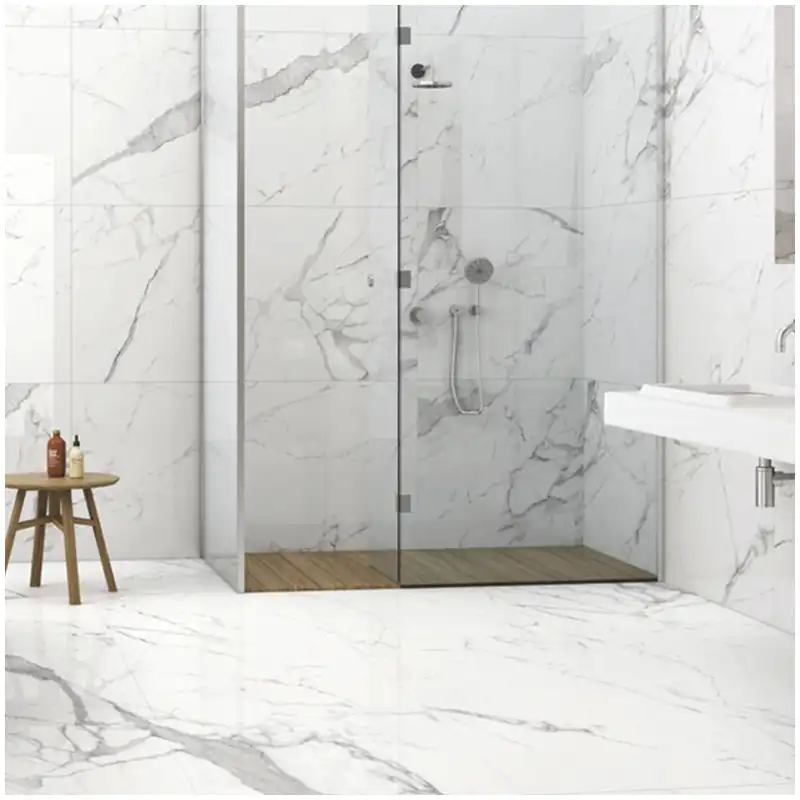
Movement joints should continue through the finish where the design requires them. Do not bridge a substrate or building movement location with a large marble panel because the vein alignment looks better. Appearance follows the assembly’s functional needs.
Flood or water testing should occur according to the approved system and sequence before sensitive finish work is accepted. Record results. A later leak investigation becomes much harder when the project cannot show whether the underlying wet area passed.
See the Shower under Warm Light, Wet Light, and Cleaning Light
Warm 3000K bathroom light can make the white field creamier. Cooler 4000K light can sharpen grey movement. A downlight near the wall shows surface variation; a mirror or niche strip shows it from the side. Test the actual intended conditions.
A Statuario marble shower walls panel may darken temporarily when wet, especially at edges or joints, depending on stone and assembly conditions. Establish realistic expectations with mock-ups and maintenance guidance. Do not diagnose permanent staining from one wet photograph.
Polished marble and honed marble respond differently to reflection, water marks, handling, and etching. Acidic cleaners can etch calcitic marble. Sealer may reduce absorption but does not prevent acid reaction. Handover cleaning instructions must be explicit.
The Statuario Venato white marble wall tiles can support a modular wall discussion, while White Statuario marble slabs suit full-panel planning. The selected format still needs actual-batch approval.
Inspect under clean water, approved lighting, and dry conditions before blaming material or workmanship. Grout haze, construction dust, sealant residue, moisture, and etching can look similar in a phone photograph. Diagnosis comes before cleaning.
Dry-Lay, Inspect, Pack, and Install the Same Wall
Open and inspect crates by room, not by convenience
Before the first panel leaves its support, compare the crate number with the room release and current elevation. Photograph closed marks, internal panel order, edge protection, and any movement inside the crate. Keep narrow niche pieces and corner returns separated from general offcuts; their codes must remain readable.
Stand the main panels on approved supports and check them under the room light before adhesive or fixings make the decision permanent. Compare background tone, vein order, top direction, holes, finish, and repair map. If one piece belongs to another range group, quarantine it with its label attached.
During installation, record any site scribe, edge dressing, or hole adjustment. Protect the newly cut stone according to the approved method. A change around a mixer or glass fixing can alter both appearance and sealing, so the responsible trades need the same update.
After installation, inspect joints, corners, niche slopes, penetrations, bottom edges, finish, sealant, and panel sequence before cleaning residues harden. Photograph the accepted elevation in dry condition and under the normal bathroom light. Keep that image with the room handover for later maintenance comparison.
Retain one labeled spare or reference piece where the project requires future comparison. Store its finish, range group, room allocation, and care history. A loose white sample without that identity cannot settle a later color or surface dispute.
Set the dry-lay to the installed elevation with panel codes, joints, corners, niche pieces, holes, floor line, and ceiling line. Include wide views and close views. Mark every approved move and issue a final layout.
Par Statuario marble shower walls, inspect dimensions, thickness, finish, edges, miters, holes, repairs, face, direction, and labels against the latest drawing. Photograph measuring tools and codes together. Keep the repair map with the piece.
Pack panels by room and installation sequence. Protect faces, corners, miters, narrow niche returns, shelves, holes, and repaired areas. The crate manifest should identify every main panel, return, spare, and room code.
At site, confirm waterproofing and substrate release, room dimensions, latest drawings, package condition, piece codes, and storage before installation. Dry-fit critical corners and niche returns when the method allows. Do not grind a matched edge without recording the change.
If the wall differs from approval, photograph the full elevation, disputed panel, joint, niche or corner, room and piece codes, light source, and neighboring stone. Stop further work. Compare the slab map, dry-lay, inspection, packing, and installation records before any repair, relocation, or remake.
Quick-Reference Checklist for Statuario Shower Walls
- Overlay joints, niche pieces, corners, holes, fittings, glass, floor, and ceiling on actual slabs.
- Approve the wall from the entrance, controls, bathtub, and inside-shower viewing positions.
- Give each panel, return, shelf, and spare a unique traceable code.
- Coordinate waterproofing, slope, drainage, movement, setting, sealant, and penetrations with qualified parties.
- Inspect niche and corner compositions under the intended warm and raking light.
- Pack by room and installation sequence with protected miters and narrow returns.
- Pause disputed installation until site evidence is compared with the approved wall records.
Bieži uzdotie jautājumi
1. Can Statuario marble be used on shower walls?
It can be specified when the actual material, finish, wet-area assembly, waterproofing, setting method, joints, sealant, slope, drainage, cleaning, maintenance, and local requirements are suitable. Approve a representative mock-up and actual slab range.
2. Should the shower niche match the main Statuario wall?
It may continue the movement or form a deliberate contrast. Lay out the back, jambs, head, and sloped sill with the main elevation. Random offcuts often create a patched appearance under niche lighting.
3. How should Statuario veins turn at shower corners?
Decide whether they continue, mirror, stop, or change deliberately. Place the two corner panels together during dry-lay, mark their installed orientation, and coordinate the joint or miter with movement and waterproofing details.
4. Why does white marble look darker when the shower is wet?
Water can temporarily change how light travels through the surface and may enter pores or joints depending on the stone and assembly. Record the dry and wet condition before diagnosing a stain. Persistent or uneven change needs investigation.
5. What should I do if Statuario marble shower walls do not match the approved dry-lay?
Photograph the full wall, panel and room codes, niche or corner, light source, joints, and neighboring pieces. Stop further cutting or installation. Compare the approved slab map, dry-lay, inspection, packing, and site records before deciding the disposition.
Final Conclusion
Statuario marble shower walls must be approved as the installed wall, not an uninterrupted slab. Put joints, niches, returns, corners, holes, slopes, wet-area interfaces, light, piece codes, and crate order into the same record before cutting.
I would rather reject one random niche return in the warehouse than stare at it under a warm light for the life of the bathroom, and that is why Esta Stone treats every small piece as part of the full wall.
References
- Dimension Stone Design Manual, Natural Stone Institute.
- ASTM C503 Standard Specification for Marble Dimension Stone, ASTM International.
- Tile Council of North America Handbook for Ceramic, Glass, and Stone Tile Installation, TCNA.
- ANSI A108/A118/A136 Installation Standards, American National Standards Institute.
- Natural Stone Care and Maintenance Guidance, Natural Stone Institute.
- Kitchen & Bathroom Planning Guidelines, National Kitchen & Bath Association.
- Shower, Wikipedia, English edition.