Calacatta Marble Staircase Layout for Treads, Risers, Landings, and Vein Direction
The tread faces look controlled when they lie flat in one row. The risers look controlled in another. I stand the first riser below its tread and the problem appears: a heavy grey vein stops at the nosing, restarts off-center on the vertical face, and creates a dark band that repeats on every second step.
That is why Calacatta marble staircase layout cannot be approved as two tile lists. A staircase is read while people move through it. Horizontal and vertical faces, front edges, landings, walls, and changing light all meet in one sequence.
My rule is direct. Draw the complete flight, number every visible face, and approve at least one representative assembled relationship before quantity cutting.
Build the Calacatta Marble Staircase Layout from One Elevation
Use finished dimensions and actual support conditions
The controlled drawing shows finished tread depth, riser height, stair width, nosing profile, edge thickness, landings, winders where present, stringers, wall interfaces, balustrade penetrations, joints, and substrate or support information required by the responsible design and installation teams.
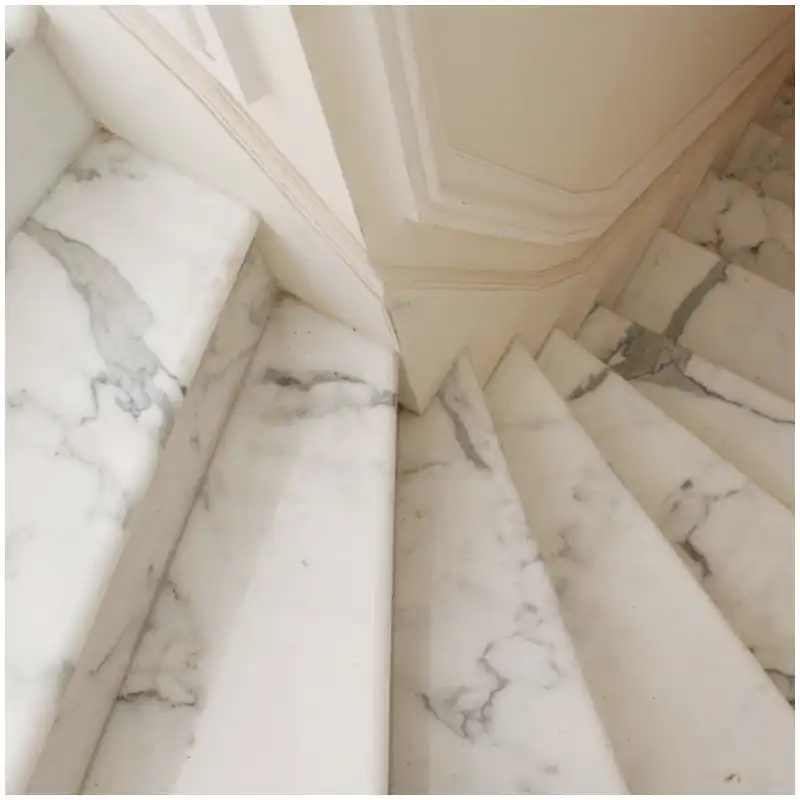
I do not infer those values from a sketch. The stone schedule and stair drawing must agree. If site dimensions govern, record the verified measurements and revision before cutting.
The selected Calacatta Marble slabs receive readable IDs. The elevation then links every tread, riser, landing, return, and spare to a source zone on those full faces.
For Calacatta marble staircase layout, I show the travel direction and the principal viewing direction. A vein that looks balanced from above may form a heavy stripe when seen from the bottom hall.
Choose a vein rule before nesting
The design may favor veins running across each tread, following the travel direction, moving upward through risers, or forming a looser controlled rhythm. Any option can work when it is intentional. The cutting map needs arrows, not vague notes such as “veins aligned.”
A marble riser vein direction can be independent from tread direction, but the transition at the nosing must still be judged. Put the two faces together. Do not approve them from separate photographs taken under different light.
Strong veins should be distributed with care. Repeating the same dark line on every third step creates a pattern. Hiding every strong vein on upper flights makes the lower flight look like another material. Natural does not mean random.
Keep the full-slab range in control
The parent Calacatta Marble Slabs: Complete Guide to Full-Slab Approval, Vein Layout, Batch Matching, and Project Selection defines the white field, undertone, vein scale, repairs, finish, and numbered slab range. The staircase drawing allocates that approved range to a demanding three-dimensional application.
Don’t just look at samples. A small chip cannot show whether twelve treads cut from one warm zone will sit beside twelve cooler risers from another slab.
| Stair element | Layout control | Condition I reject or revise | Evidence |
|---|---|---|---|
| Tread | Tone, vein arrow, nosing source, penetrations | Weak or repaired zone crosses exposed front | Slab overlay and full-face image |
| Stúpačka | Visible height, vein relation, top and side joints | Dark fragment repeats as unintended stripe | Assembled tread-riser dry fit |
| Nosing | Profile, build-up, vein, fill, arris | Edge tone or polish frames every step | Profile sample and raking view |
| Landing | Grid, joints, flight transition, border | Landing becomes isolated warm or dark patch | Plan and approach view |
| Spare | Compatible flight, direction, profile potential | Nominal color only, no sequence match | Area group and crate record |
The table makes Calacatta marble staircase layout inspectable. It also prevents the landing and nosing from being treated as accessories after the main treads are cut.
Coordinate Treads, Risers, and Nosings as One Set
Protect the front edge from bad feature placement
The front of a tread is exposed to close view and regular contact. A strong fill, open fissure, mesh repair, or awkward vein fragment near the nosing needs specific review. Color alone does not show whether the local condition suits the intended profile and fabrication.
The fabricator determines reinforcement, cutting order, edge method, and handling from the actual stone, span, support, and profile. I make sure the slab map identifies every repair and natural feature before the nosing line is fixed.
With Calacatta Gold Marble floor tile, warm veins can deepen along a polished or built-up edge. The project sample must show the finished nosing rather than only a flat face.
Decide whether the edge is solid, laminated, or mitred
A solid thick tread, laminated strip, and mitred build-up create different vein and joint conditions. The drawing states the construction. For built-up work, the source strip and face relationship appear on the cutting map.
A marble stair nosing detail also defines arris, visible glue line, underside return, end condition, and transition at exposed sides. Check it at full scale under raking light.
For Calacatta marble staircase layout, repeated edge differences become stronger than one local mismatch. Approve a representative run, not one isolated perfect tread.
Stand the riser below the tread
Horizontal and vertical planes catch light differently. A riser may look cooler because it reflects another part of the room. A polished tread can carry ceiling reflections while the riser reads mostly by frontal light.
I dry-fit at least a representative tread-riser-nosing set under the intended viewing direction. Check joints, vein interruption, tone, edge, finish, and any side return. The floor cannot be judged from overhead photographs alone.
Stránka White Calacatta Gold Marble tile can supply smaller riser or landing modules when the actual slab range and finish are compatible. Never combine product pages as proof of a batch match.
Make the Landing Belong to Both Flights
View the approach from below and above
A landing is a floor and a turning point. From below, its front edge completes the first flight. From above, its field begins the next. Photograph both approaches and the plan arrangement.
A Calacatta stair landing should not receive leftover pieces after tread nesting. Its area, border, joint grid, and directional relationship need reserved slab zones before yield is finalized.
During Calacatta marble staircase layout, I compare the landing with the last riser below and first riser above. A gradual tone shift can work. A hard change at the turn looks like a batch error.
Resolve walls, skirtings, and open ends
Wall strings, skirtings, side cladding, and exposed tread ends create extra joints. Their veins can continue, contrast, or remain quiet according to the design. Put every visible strip on the elevation.
At an open side, a return or end cap may reveal the stone’s thickness and repair history. Check color, fill, polish, and vein fragment. A narrow end cut from a dramatic vein can look like a stain.
Place balustrade and fixing information before cutting
Posts, channels, glass, anchors, and other components may require penetrations or edge clearances. The responsible structural and specialist teams define their system. The stone map must show approved holes and zones so they do not collide with a repair or critical edge condition.
I do not drill from a generic stair detail. Final component data, setting-out, and support must reach the fabricator in one controlled revision.
The Hard-Won Lesson: Treads and risers cannot be approved in separate rows
A familiar layout failure places every tread face in one photograph and every riser in another. Both rows look balanced. When the first assembled sequence is built, dark riser veins repeatedly stop under quiet tread noses and create a striped elevation. Reordering risers then breaks piece IDs, landing groups, and replacement allocation.
The Lesson: Approve the staircase as assembled tread-riser pairs before releasing repeated cutting.
Inspect, Revise, and Pack the Stair Sequence
Inspect the real finish in two light directions
Diffuse light shows the overall white field and vein balance. Raking light shows grinding lines, edge waves, fill depressions, chips, and joint differences. Stair lighting often comes from walls or step lights, so local edge conditions can become more visible than on a flat floor.
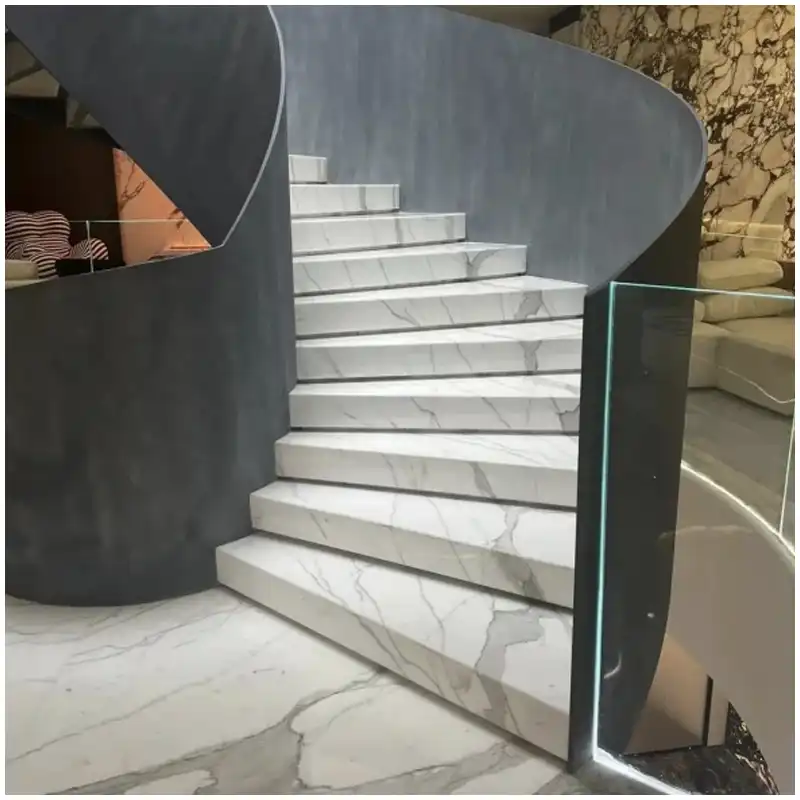
Lighting lies if one row is wet and another is dry. Clean and dry every comparison group. Record protective film, treatment, and viewing condition.
Každý Calacatta marble staircase layout revision includes the real finished-face photographs, not only the pre-cut slab map. That comparison confirms whether fabrication preserved the selected composition.
Keep physical inspection separate from visual sequence
Check dimensions, thickness, plane, squareness, edge profile, chips, repairs, holes, and finish against the project criteria. A piece cannot remain because it completes a beautiful vein if its physical condition fails.
Stránka White Marble Tile Lippage guide explains why substrate, setting, joints, and piece plane affect finished edge relationships. A factory dry fit records the stone; it does not certify site installation conditions.
Pack by flight and installation sequence
Labels identify flight, step number, tread or riser, landing grid, orientation, and matched set. The crate manifest shows where each piece sits. If weight and safety require separate crates, cross-reference the matched sequence.
Protect nosings from hard contact. Test separators and face protection for transfer or trapped moisture. Photograph approved dry faces before opaque wrapping.
Replacement pieces are assigned to a flight or tone group. A spare tread also needs sufficient size and compatible vein direction for the required profile. Random offcuts are not a replacement plan.
Prove templates before consuming matched slab zones
Stairs are rarely forgiving of an unverified template. Walls can lean, finished widths can vary, and a landing corner may not be square. The project team decides which dimensions come from design drawings and which require verified site templates. The record carries the template ID, orientation, date, and relationship to the stair elevation.
I compare every unusual winder, end tread, landing return, and wall-side cut with that record before nesting. If a template changes, the cutting map changes. Reusing the old slab overlay because the difference looks small can move a vein onto the nosing or leave no material for a side return.
This is where Calacatta marble staircase layout becomes more than a color plan. It protects scarce matched zones from being cut to obsolete geometry and keeps the visual sequence attached to the dimension that produced it.
Handover the installed-face map
The installer receives a clear elevation with piece IDs, flight and step numbers, orientation, crate location, edge designation, and matched-set references. Concealed marks must remain readable until placement. The map also identifies pieces with approved repairs so they are not mistaken for transport damage.
Before adhesive or fixing work begins, the site team can stage one flight in sequence and compare it with the approved arrangement. Any wrong group, rotated face, or missing component is easier to correct while the stone is still protected and traceable.
After installation, keep the source slab and spare record with the handover file. A future replacement decision needs more than a stone name. It needs compatible undertone, vein direction, thickness, finish, nosing potential, and the exact flight where the piece will sit.
When the Installed Stair Reads as Stripes
Check sequence and light before blaming the slab
Confirm step IDs, tread-riser pairs, orientation, dryness, cleaning, temporary lighting, and remaining protection. Compare the site flight with the approved elevation and packing manifest.
Stop work on the connected group
Photograph the entire flight and close details, pause further installation or edge treatment, and send the supplier the original slab map, assembled approval, inspection results, and crate records.
Protect working relationships
Moving one riser can affect the next tread, landing transition, and spare group. Review the full sequence before authorizing a swap.
Quick-Reference Checklist for Calacatta Stairs
- Verify finished stair dimensions and support details before slab nesting.
- Number every tread, riser, nosing, landing, return, and spare.
- Draw vein arrows from both travel and principal viewing directions.
- Inspect repairs and natural features around front edges and holes.
- Dry-fit representative tread-riser-nosing assemblies under useful light.
- Close every layout move in a numbered final revision.
- Pack matched sets by flight, step, orientation, and installation order.
Frequently Asked Questions
1. What must a Calacatta marble staircase layout include?
It must include numbered treads, risers, nosings, landings, side pieces, penetrations, orientation, source slabs, repairs, dry-fit relationships, revisions, crate locations, and compatible spares.
2. Should tread and riser veins line up exactly?
Not always. They need an intentional relationship that suits the design and actual slab. Approve assembled pairs so vein endings and tone changes do not create accidental stripes.
3. Why does stair marble look different from floor marble?
Treads and risers face different directions and reflect different light. Edges, step lights, shadows, and viewing angle can strengthen veins, fills, and finish variation.
4. Can landing pieces come from leftover slab areas?
Only when those areas match the approved tone, direction, finish, dimensions, and transition to both flights. Reserve important landing groups before general yield cutting.
5. What should happen when the installed stair sequence is wrong?
Document the full flight and piece IDs, stop affected work, and compare the site sequence with the approved elevation, dry-fit record, inspection, and crate manifest before moving stone.
Final Conclusion
Calacatta marble staircase layout succeeds when the slab range, tread-riser pairs, nosings, landings, holes, light, inspection status, packing order, and spares remain one controlled sequence. I would rather rebuild one warehouse step than let an accidental stripe climb an entire flight, and Esta Stone keeps every face attached to its approved position.
References
- Dimension Stone Design Manual, Natural Stone Institute.
- ASTM C503 Standard Specification for Marble Dimension Stone, ASTM International.
- ASTM C97 Standard Test Methods for Absorption and Bulk Specific Gravity of Dimension Stone, ASTM International.
- ASTM C1353 Standard Test Method for Abrasion Resistance of Dimension Stone Subjected to Foot Traffic, ASTM International.
- Installation Guidelines and Product Standards, Tile Council of North America.
- Natural Stone Care and Maintenance Guidance, Natural Stone Institute.
- Mramor, Wikipedia, English edition.