




Volakas Marble Shower Floor: Tile Size, Joint Grid, Drain Cuts, and Grey Vein Allocation
The drain position, slope geometry, and wet-floor constraints are settled first, and the shower floor drainage and slope guide owns that construction sequence; it is not re-taught here. Inside those fixed constraints, the Volakas decision begins: the tile size and the joint grid, because a pale field puts every joint on display long before anyone steps into the shower. Change the module and the same lot can look quiet in one bathroom and restless in the next. I want that choice settled while the pieces are still loose, and the drain cut usually decides how many pieces have to move with it.
Set the tile size and joint grid before anything is cut
The module and the joint grid decide how the grey diagonal movement is read across the floor. Where the drain geometry and the falls allow full pieces, a larger module gives one diagonal family a longer run, so the field can read as a single surface; wedge cuts around the drain often force smaller pieces, and the grid must be chosen after those cuts are mapped. A smaller module repeats the movement at every joint, which suits a narrow room but can turn a strong run into a pattern band.
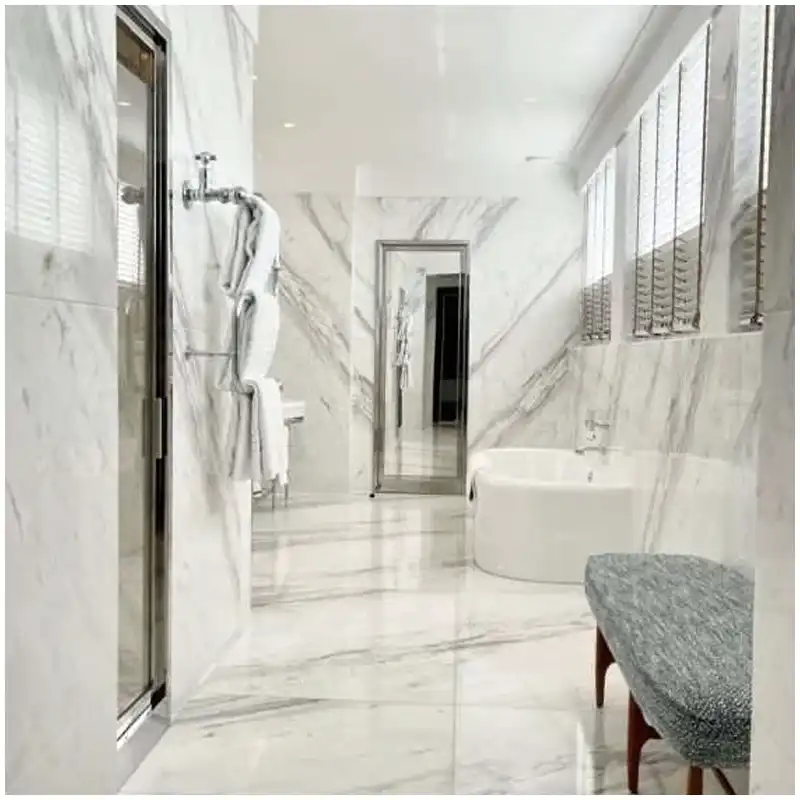
Read the proposed grid against the actual lot. Lay the module over the full face at the joint width you intend to install, then step back to the doorway and look again. The grid that keeps the entry view calm is usually the one that reads with the diagonals in Volakas white marble tiles; confirm that continuity on the full slab face before fixing the module.
The joint width belongs to the same decision. A fine joint lets the grey movement run almost uninterrupted across a pale face, while a wider joint turns the grid itself into part of the pattern. I decide the module and the joint width together, then check the pair from the normal viewing distance rather than from a kneeling position, because nobody reads a bathroom floor from close up.
The setting system shows through as well. On a pale field the adhesive and bedding tone can change how the ground reads at the joints, so the substrate and adhesive choice belongs in the same test the project requires for the finish. Confirm the substrate preparation requirements for the chosen adhesive system before fixing the field.
Slip performance is not settled by the stone name. It depends on the finish, the joint width, the setting system and the test the project specifies, so ask for the finish sample and the documented result before the wet field is approved, and keep both with the layout record. A Volakas marble shower floor that is approved on appearance alone has left the safety question to whoever installs it.
Allocate the grey diagonal movement across the field
Allocation is the part most buyers underestimate, and I treat it as part of slab selection rather than part of tiling. A Volakas block carries quiet ground, heavier diagonal runs and cloudy mineral zones, and each piece should go where it can carry that load. Keep the entry field and the main viewing line calm, and let the stronger movement travel toward the drain side, where the fittings already break the surface. Volakas is a grey vein marble, so this is mostly a placement exercise for movement.
Name the pieces in the plan. A photographed dry-lay with piece numbers written beside the joints is easier to defend than an instruction to balance the veining, because the next team can see which way the movement travels and where it was allowed to be strong.
Keep the wall board release record separate from this floor layout so a shower wall specification does not overwrite the floor decisions.
The allocation also sets the joint rhythm on a Volakas marble shower floor: a joint placed beside a heavy diagonal either carries that line forward or cuts it in half.
Place the drain cut where the floor is read
The drain cut interrupts the grid, so it has to be decided with the layout rather than after it. The feasible routes depend on the drain type, the required slope planes, the tile format, and the installer’s layout constraints; within those, common strategies include centring a module on the drain so the joints run symmetrically, or stepping the grid deliberately so the cut lands on one clean joint line. A ring of narrow cut pieces around the drain carries a real layout risk, because it can read as a repaired area from the standing positions in the shower; approve it only when the project accepts that visual outcome.
Stand where the floor will be used before the cut is final. On a Volakas marble shower floor the drain sits close from the shower entry and half hidden from the doorway, so decide which view matters most and place the cut for that view.
Verify the slope, waterproofing and movement-joint details against the project specification and the installation requirements of the Tile Council of North America Handbook before finalizing the drain cut geometry.
The cut also changes what the floor feels like underfoot. On a Volakas marble shower floor the joint ring around the drain is felt before the pattern is seen, so its cut-piece width, edge alignment and lippage are the measurable checks, alongside barefoot comfort at the standing positions. I decide the cut from the drain outward and keep the whole pieces as large as the room allows, rather than filling the last strip with whatever is left on the rack.
Hold back the heavy and cloudy pieces
Every lot produces pieces that should not sit in the main field. Heavy movement with no room to continue, a cloudy zone that may resemble uneven darkening or moisture-related discoloration under some lighting and wet conditions, and a piece with mineral concentration close to a cut all belong on a hold list. Name them before cutting starts, photograph them, and place them where the field can carry them or replace them. I list those pieces while the lot is still on the rack, because a decision made at that point costs far less than replacing a piece after cutting or installation.
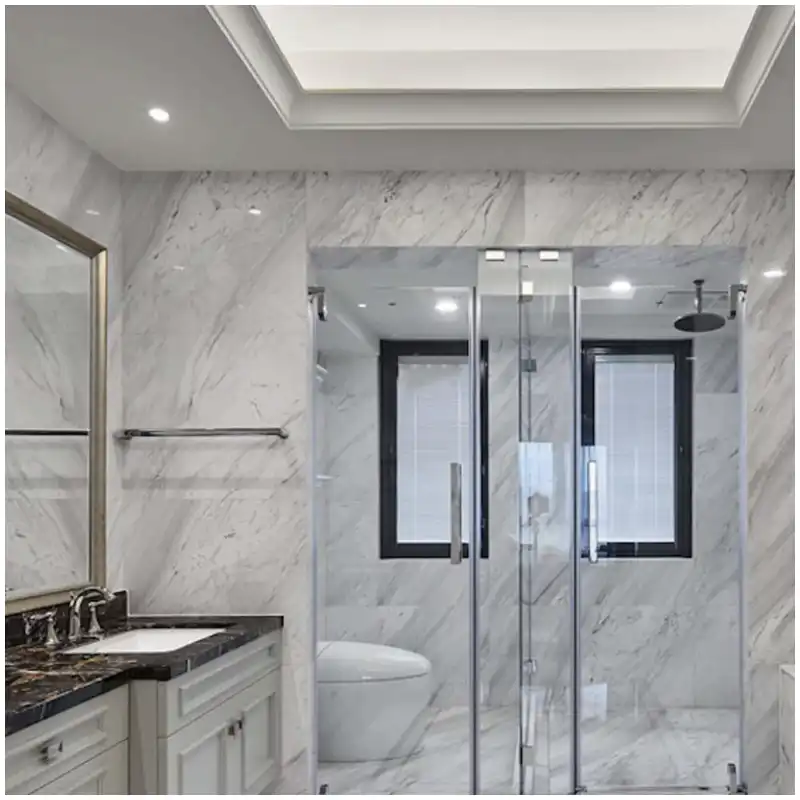
Replacement is a stock question, not a repair question. Reserve replacement pieces from the same lot to reduce the risk that a rejected position is filled with a visible shade mismatch; same-lot material can still vary, which is why the held pieces are matched against the record, not just the lot number.
On a Volakas marble shower floor the held-back list is short but specific, and it is the pale ground that makes a cloudy zone read so strongly beside a joint.
Keep one record for the layout decision
Write the decision down in plain language. A note that says the heavier diagonal was placed toward the drain, and that some pieces were held back, tells the next shift more than a folder of uncaptioned photographs.
The layout needs one record that the fabricator, the installer and the project coordinator all read the same way. A Volakas marble shower floor decision holds better on one marked dry-lay sheet than across four conversations, and the sheet needs named fields: piece ID, orientation, joint width, drain geometry, approved viewing direction, date, and approver.
| Decision | What the loose layout must show | Where the record lives |
|---|---|---|
| Tile module and joint grid | The diagonal movement reads as one field from the entry | Marked dry-lay sheet |
| Grey vein allocation | Stronger runs placed away from the main viewing line, or feature veining placed on it by design, recorded as the project’s allocation choice | Photographed allocation plan |
| Drain cut placement | No ring of narrow pieces around the drain | Drain cut drawing |
| Held-back pieces | Heavy and cloudy pieces named before cutting | Reserved stock list |
Condition note: the rows above are controlled warehouse observations from a loose dry-lay, and a photograph is a layout record, not a colour measurement.
The Hard-Won Lesson: The drain cut changed the field the sample had promised
A small cut can sit on the quiet part of a Volakas block and make the whole lot look calm. The same lot on a floor carries the grey diagonal again at every joint, and the pieces ringed around a drain are narrower than anything on the rack, so the movement has nowhere to continue. The field that was approved from a sample is then read as broken at the one place every bather looks. Don’t just look at samples when the drain cut is already known.
The Lesson: Mark the drain cut and the joint grid on the loose field first, then approve only the pieces that can carry their own movement into that layout.
What actually decides a Volakas marble shower floor layout
Where the grey movement should land
Keep the quieter ground in the entry view and send the strongest diagonal to the area that slope, fittings or furniture already break up. A layout that puts its heaviest movement at the first step into the shower is the one that gets questioned, because the eye lands there before it reaches anything else.
What the loose layout has to prove
The test is not decorative. One view has to show the module, the joint width, the drain cut and the direction of travel together, which is why the record needs both: a photograph of the laid-out field and the written allocation notes, because they serve different control functions and the strongest handover file pairs them. Follow the standard dry-lay sequence to verify joint alignment and movement direction before cutting.
When to hold the field instead of cutting
Hold when a piece has no room for its movement, when the drain ring is filling with narrow cuts, or when the finish sample has no documented slip performance for the setting the project will use, measured by the test method the project specification names and accepted against the criterion the specifier sets. Cutting before those answers exist is how a layout argument starts, and I would stop the layout at that point rather than stop the cutter later. On a wet floor the correction is never only cosmetic.
What the room light changes on a pale field
Photograph the loose field under the light the room will actually carry, because a pale marble with grey movement reads cooler or warmer as the colour temperature changes. I keep the same piece in the frame with the lighting condition written beside it, so a later disagreement is answered with the photograph rather than with an opinion. A Volakas marble shower floor approved under one lamp and installed under another is exactly the argument this record settles in advance.
What is checked again after installation
Look at the finished field from the entry and from the drain with the room light on, then note any installed lippage at the joints while the floor is still under review. Measure installed lippage against the tolerance specified in the project contract.
When a layout hold on Volakas marble shower floor is needed
The layout hold closes at authorized release before cutting; conformity of the installed field is then a separate inspection stage against the same record.
- Document. Photograph the field, the drain cut, the joint grid and the room lighting of the affected area before anything is cut or moved.
- Isolate. Hold the pieces and stop cutting at that location so the rest of the lot stays available for comparison.
- Escalate or hold. Send the records to the stone supplier and the project team, and keep the layout on hold until an authorized disposition arrives.
Frequently Asked Questions
1. How do I choose the tile size for a Volakas marble shower floor?
Choose the module on the loose layout, not from a catalogue. A larger module lets one diagonal family run further and keeps the field calmer, while a smaller module repeats that movement at every joint. Check both against the drain cut and the room width before the order is placed.
2. Where should the grey veins fall across the floor?
Keep the quiet ground at the entry and along the main viewing line, and send the heavier diagonal toward the drain side where fittings already break the surface. Mark the pieces that carry each role on the dry-lay so the allocation survives the next shift.
3. How is the drain cut placed without breaking the pattern?
Within the constraints of the drain type, slope planes and tile format, common routes are centring a module on the drain or stepping the grid so the cut lands on a clean joint line; either way, draw it and approve it. What needs explicit approval is a ring of narrow cut pieces, which can read as a repair from the standing positions in the shower.
4. What does the finish change on a shower floor?
Slip behaviour depends on the finish, the joint width, the setting system and the test the project specifies, so no stone name settles it by itself. Request the finish sample and the documented test result before the wet field is released for cutting. A Volakas marble bathroom is judged barefoot and wet, not only by eye.
5. What happens when a piece does not match the allocated field?
Hold it, name it on the record and take a replacement from the reserved stock instead of improvising a new position. Once the pieces are fixed to the floor, the cheapest correction has already been lost.
Quick-Reference Checklist
- Mark the tile module, the joint grid and the drain cut on the loose layout before any cutting starts.
- Place the stronger grey movement where the field can carry it, not in the entry view.
- Hold the heavy and cloudy pieces back and name them on the reserved stock list.
- Check the finish sample and the slip test the project requires before approving a white marble wet zone.
- Photograph the entry view and the drain view in the room light before releasing the floor.
Final Conclusion
A Volakas marble shower floor is a slab allocation decision before it is a tiling decision, and the loose layout is the last cheap moment to correct it. Colour temperature, illuminance and viewing angle each change the perceived contrast and warmth of a pale field, and the entry view is where grey diagonal movement either reads as one floor or does not. Esta Stone would rather hold that layout for a day than argue about a fixed one, and the record that leaves the yard should say which pieces were allowed to be strong and which were held back.
Referenzen
- Marmor, Wikipedia.
- Dimension Stone Design Manual, Natural Stone Institute (marble properties and wet-area design guidance).
- ASTM C503 Standard Specification for Marble Dimension Stone, ASTM International (material and physical requirements of the marble itself).
- ASTM C97/C97M Standard Test Methods for Absorption and Bulk Specific Gravity of Dimension Stone, ASTM International (lot absorption data used in finish and maintenance choices).
- Handbook for Ceramic, Glass, and Stone Tile Installation, Tile Council of North America (slope, movement joints and installation requirements cited for the drain and layout checks).
- Kitchen and Bath Planning Guidelines, National Kitchen and Bath Association.
- Architectural Stone Guidance, Stone Federation Great Britain.