


Calacatta Marble Floor Tile Dry-Lay before Cutting Borders and Doorways
The tiles are arranged in tidy rows and the photograph looks calm. Then I compare it with the floor plan. The dark-veined pieces all sit in the first two rows, the doorway cuts are absent, and the border has been represented by a chalk line that does not match its finished width.
I stop there. A Calacatta marble floor tile dry lay is useful only when it represents the real floor. It must show where pieces belong, how veins move, where borders turn, what happens at doors, and which revision will be packed.
The short answer is practical: approve relationships, not rows. A warehouse arrangement should answer a site question before the stone enters a crate.
Build the Calacatta Marble Floor Tile Dry Lay from the Plan
Start with one controlled drawing revision
The drawing identifies room, level, grid or starting point, tile module, joint width, border dimensions, pattern, movement locations defined by the responsible design team, thresholds, drains, columns, stairs, and fixed interruptions. Every dry-lay image carries that revision.
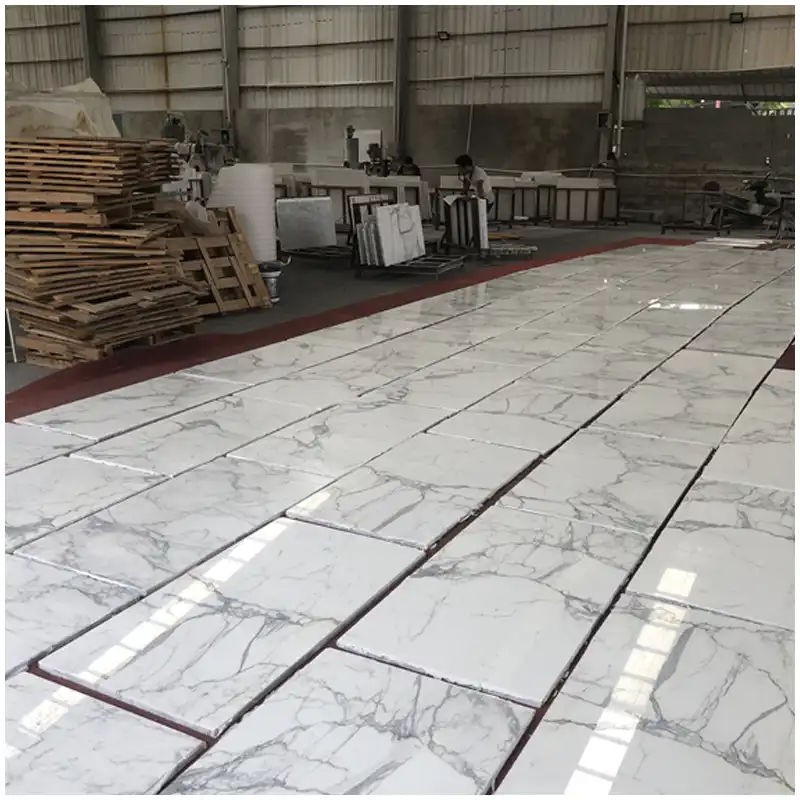
The Calacatta White Marble -laatat selected for the order must be connected to numbered source slabs or approved batch groups. Product identity alone cannot tell me which pieces belong beside one another.
Sopii Calacatta marble floor tile dry lay, I mark a clear orientation arrow and a piece coordinate. “Row 1” is not enough when the room has two wings. A code such as room-grid-position gives the installer and inspector a shared reference.
Show the intended joint
Tiles pushed edge to edge hide the real rhythm. Use the specified or approved representation of joint width in the factory arrangement. The dry-lay is not an installation mock-up, but it should not create false vein continuity by removing every gap.
The floor plan must distinguish nominal module from actual cut pieces. Borders, wall cuts, column cuts, and doorway infills need their own IDs. If they have not been fabricated yet, the review is incomplete and should be labeled as such.
A Calacatta floor tile layout also shows finished-face orientation. Turning one tile 180 degrees can improve or damage the flow. The arrow remains on the protective label, not on the visible marble face.
Do not confuse visual layout with dimensional inspection
The arrangement checks tone and relationships. Dimensions, thickness, squareness, edge condition, finish, and plane need their own inspection records. A tile that improves the color sequence cannot stay if it fails the agreed physical criteria.
I put held pieces outside the layout and mark the gap. Replacing them secretly makes the photograph prettier but destroys traceability. The next revision records the new piece and its source group.
| Dry-lay checkpoint | Pass condition | Failure I stop | Evidence |
|---|---|---|---|
| Drawing and grid | Current room shape and coordinates shown | Generic rectangle replaces actual plan | Revision and layout key |
| Tone distribution | Approved groups arranged intentionally | Dark or warm pieces form accidental patch | Overall neutral-light image |
| Vein direction | Arrows and transitions match design | One rotated tile breaks a visible line | Piece IDs and direction marks |
| Borders and doors | Real cuts, widths, and meeting points shown | Field approved without edge conditions | Detail dry-fit photographs |
| Revision and packing | Final positions match crate schedule | Approved layout and packed order differ | Signed map and manifest |
The table turns Calacatta marble floor tile dry lay into a controlled inspection step. It also makes missing borders and door pieces impossible to hide behind a good overall photograph.
Photograph enough scale to expose a slow batch shift
A close image of six tiles can hide a gradual change that becomes obvious across a corridor. I require an overall view covering a meaningful run, plus numbered detail views that remain readable. Where the full floor cannot fit in one frame, use overlapping sections tied to the drawing grid. The overlap proves that one section did not end with a warm group while the next quietly began with a cooler group.
The camera stays square enough to judge rows, but I also ask for the main entrance sightline. That lower angle reveals long dark bands and repeated vein fragments. For Calacatta marble floor tile dry lay, a photograph is evidence only when the reviewer can locate every visible piece on the plan.
Keep production groups visible inside one approved range
Tiles cut from several slabs may all pass the signed range sample. I still record their source groups. If a later replacement, stain investigation, or tone complaint appears, that information shows whether the condition is isolated or repeated. It also prevents the darkest source group from being consumed entirely in one small room.
A second Calacatta marble floor tile dry lay may be required after a held group is replaced or a border revision changes field dimensions. The new submission must show exactly what changed; it should not restart approval with another unmarked set of attractive rows.
Distribute Tone and Veins without Making a Pattern
Use the approved range, then create compatible zones
The full-slab approval defines acceptable field tone, vein strength, warm or cool limits, repairs, and finish. The floor layout decides where those acceptable pieces go. Those are different decisions.
The Calacatta Marble Slabs: Complete Guide to Full-Slab Approval, Vein Layout, Batch Matching, and Project Selection remains the main range record. I use its numbered groups when I judge an entire floor.
A white marble tile range should not be shuffled mechanically. Alternating light and dark like a checkerboard looks just as artificial as putting all dark pieces in one corner. I arrange gradual transitions and protect important sightlines.
Look from the room entrance
A floor is first read from doors and circulation paths, not from a camera directly above the center. I ask for an overall plan view and a lower-angle view along the principal sightline. The second image exposes strong bands that the overhead view can flatten.
Lighting lies when one side of the warehouse receives daylight and the other sits under cool lamps. Keep the comparison field under the same light, or move representative rows and photograph them consistently.
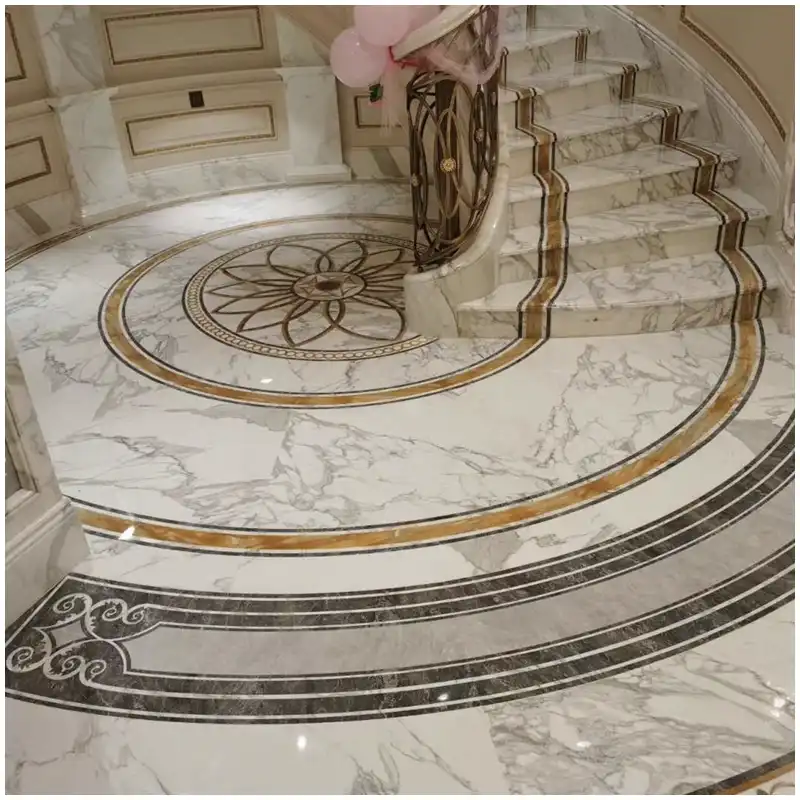
Sopii Calacatta marble floor tile dry lay, the surface must be clean and dry. Water darkens white marble; dust can make one row look greyer; protective film can add blue or yellow reflection.
Do not force vein continuation that the modules cannot hold
Some adjacent tiles cut from neighboring slab zones can create a natural flow. Others cannot. The goal is not to invent a perfect bookmatch across small modules. It is to avoid abrupt collisions, repeated identical marks, and isolated fragments that look like stains.
The Calacatta Marble tile 12×24 module will break a broad vein into more joints than a large panel. The dry-lay has to judge that module honestly instead of borrowing a full-slab image.
I flag tiles with a dominant local mark. They may work at a border, under fixed furniture, or within a stronger group according to the design. Allocation is permitted only inside the approved quality standard.
Resolve Borders, Doorways, and Floor Transitions
Borders change the field dimensions
A border is not decoration added after field approval. Its exact width and joint positions determine where the field begins, whether centerlines hold, and how narrow cuts become at opposite walls. The factory layout uses finished dimensions from the current drawing.
For a framed room, lay at least representative corners with real border pieces. Check tone, vein direction, mitres or butt joints, and how the border meets the field. A darker border can be intentional; an unexplained dark corner is not.
During Calacatta marble floor tile dry lay, I inspect the border source group separately. Thin strips can show a stronger vein concentration than the larger slab because only one narrow path was selected.
Doorways are where two approved floors disagree
Door openings concentrate cuts, thresholds, centerline decisions, and changes between rooms. The drawing states whether field joints align through the door, stop at a threshold, or change direction. Show the complete doorway condition in the layout.
A marble doorway cut should avoid weak narrow returns and badly placed vein fragments. The fabricator and installer review geometry, substrate, support, adjoining finish, and movement detail under the project’s requirements.
If two rooms use different tone groups, decide where the transition belongs. Hiding the decision under the door leaf may work only if the exact closed position and threshold detail agree. Put it on the plan.
Check plane and edge before blaming layout
Apparent tone can change when one tile tilts toward the light. Warped pieces, inconsistent thickness, chipped arrises, or uneven support in the warehouse can create false shadows. Inspect physical condition separately.
The White Marble Tile Lippage guide explains how size, plane, substrate, setting, joints, and installation affect finished edges. The dry-lay cannot certify the installed substrate, but it can identify suspect tile geometry before packing.
The related White Marble Tile Warping record helps separate material plane from a visual arrangement problem. A prettier sequence does not cure a tile that cannot sit within the project’s acceptance method.
The Hard-Won Lesson: A perfect field photograph can hide a failed doorway
A common dry-lay approval shows only full field tiles because the narrow doorway pieces are still being cut. The field receives a signature. Later, a strong vein is trapped in one small threshold return and the adjoining room begins with a noticeably warmer tile. Both conditions sit at the main entrance, but neither appeared in the approved image.
The Lesson: Do not release a Calacatta floor until every visible border, threshold, and doorway cut appears in the layout record.
Control Revision, Inspection, and Packing
Record every move
When a tile changes position, update the map. When a held tile is replaced, record the new piece ID, source group, inspection result, and position. Comments such as “swap these two” must be closed in the next numbered revision.
Each Calacatta marble floor tile dry lay revision states draft, submitted, approved with comments, or approved for packing. An attractive image without status is not a release record.
Inspect adhesive-facing backs where relevant
White marble can show changes linked to moisture, contaminants, mesh, resin, backing, and installation materials. The responsible project team selects a compatible installation system and tests it for the actual stone and conditions.
The White Marble Adhesive Selection guide identifies the information the installer needs before work. Factory photographs should document backs, mesh, resin, repairs, and any condition that may affect that decision.
Pack by installation logic
The packing plan balances crate safety with room and sequence access. If one room is divided among crates, the manifest must make every position easy to locate. Labels carry project, room, grid, piece range, quantity, and orientation.
Photograph the final approved arrangement before protection. Then verify labels against the map as pieces enter crates. A signed layout is wasted when the packing list rearranges it without a trace.
Spare tiles receive source group, orientation, finish, dimensions, and compatible room notes. A spare from a warmer group may not belong in a cool focal area even when its size matches.
When the Site Floor Does Not Match the Approved Layout
Check IDs and condition first
Confirm the installed pieces, room grid, orientation, light, moisture, cleaning state, and remaining protection. Compare the actual sequence with the approved map and crate manifest.
Do not polish away the evidence
Photograph the full floor and close details, stop the affected installation, and contact the supplier with original dry-lay and inspection records. Grinding, sealing, or moving pieces before review can hide the cause.
Separate layout, material, and installation issues
A wrong position, unexpected natural range, retained moisture, adhesive-related change, lippage shadow, residue, and surface damage need different responses. Name the observed condition before choosing a remedy.
Quick-Reference Checklist for Calacatta Floor Dry-Lay
- Use the current room plan, grid, pattern, border, and doorway details.
- Display real joints, piece IDs, and finished-face orientation.
- Distribute approved tone groups without mechanical alternation.
- Inspect the floor from main entrances and circulation sightlines.
- Include every border, threshold, return, and narrow cut.
- Close moves and replacements in a numbered final revision.
- Match crate labels and spare groups to the approved position map.
Frequently Asked Questions
1. What must a Calacatta marble floor tile dry lay show?
It must show the current floor plan, room grid, piece IDs, direction, joints, tone groups, borders, thresholds, doorway cuts, revision status, and the final sequence used for packing.
2. Should Calacatta floor tiles be mixed randomly?
No. Natural variation should be distributed deliberately within the approved range. Avoid both accidental patches and artificial checkerboard alternation.
3. Can dry-lay approval replace dimensional inspection?
No. Size, thickness, squareness, plane, edges, finish, repairs, and backs need separate records. Visual placement cannot release a physically nonconforming piece.
4. Why must doorway pieces appear in the layout?
Doorways concentrate narrow cuts, thresholds, room transitions, and important sightlines. Omitting them can hide the most visible tone or vein conflict in the floor.
5. What should happen when the installed sequence is wrong?
Document the full area and piece IDs, stop affected work, and compare the site grid with the approved layout, inspection status, and crate manifest before moving or treating stone.
Final Conclusion
Calacatta marble floor tile dry lay earns approval when the real plan, tone groups, vein direction, joints, borders, door cuts, piece status, revision, and packing sequence agree. I would rather reject one tidy warehouse photograph than let an unseen threshold become the strongest mark in the room, and Esta Stone keeps every approved position traceable.
References
- Dimension Stone Design Manual, Natural Stone Institute.
- ASTM C503 Standard Specification for Marble Dimension Stone, ASTM International.
- ASTM C97 Standard Test Methods for Absorption and Bulk Specific Gravity of Dimension Stone, ASTM International.
- Installation Guidelines and Product Standards, Tile Council of North America.
- Natural Stone Tile Installation Guidance, Natural Stone Institute.
- Natural Stone Care and Maintenance Guidance, Natural Stone Institute.
- Marmori, Wikipedia, English edition.