
White Marble Mitered Edge Matching: Vein Direction, Lamination, Resin, and Final Lighting
A miter can look perfect from three metres away and wrong the moment someone stands at the vanity. The face is cool white, the return is warmer, and the grey vein stops as if somebody cut the drawing in half. I reject that logic before production. White marble mitered edge matching starts on the full slab.
The first answer is to reserve the return strip during layout. Do not cut the main face, use the remaining offcut, and hope the corner reads continuously. Mark the face, return, orientation, finished depth, joint, and polishing direction together.
Plan White Marble Mitered Edge Matching on the Numbered Slab
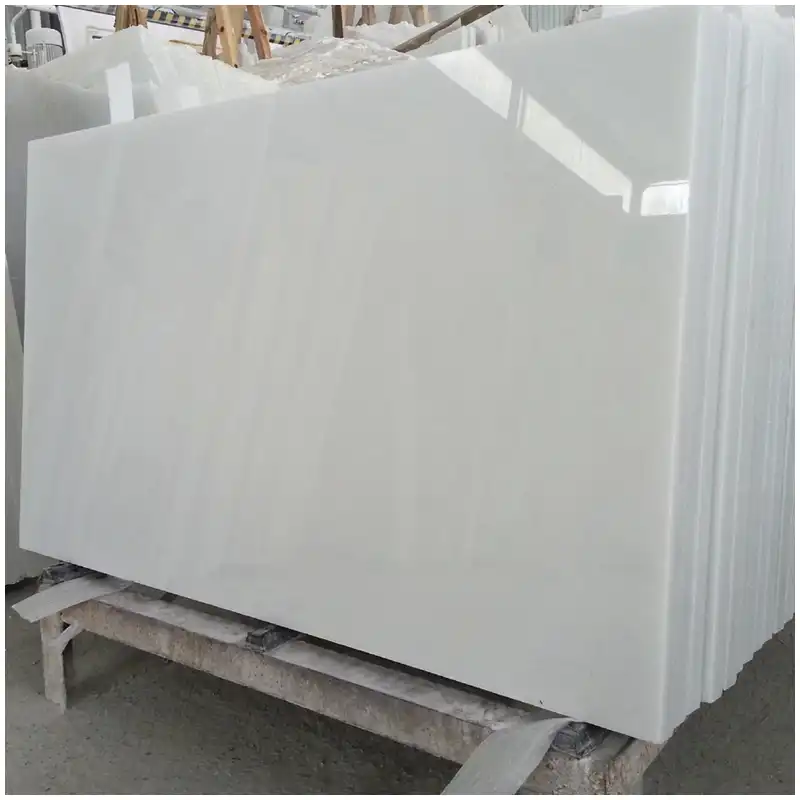
I work from a full-face photograph with scale and slab ID. The finished top, waterfall, apron, or furniture edge is placed on that image, including the strip needed for the return. If the return must continue a vein, its cut direction is fixed before the saw starts.

The parent White Marble Slabs: Complete Guide to Types, Selection, Price, Bathrooms, Lighting, and Batch Control provides the accepted range and lighting standard. A well-matched corner cannot rescue a slab that sits outside the approved white-marble group.
A Calacatta fehér márványlap may carry one broad vein across a quiet field. The return strip can continue that line, soften it, or deliberately avoid it. What it cannot do is arrive by accident.
A miter joint is a visual turn, not a printed fold
The basic geometry of a miter joint is simple. Natural stone is not. Vein depth, saw kerf, face selection, strip width, polishing, resin, and the cut angle affect the visible turn.
Marble miter vein alignment does not always mean an exact bookmatch. Some veins turn naturally through the corner; others look forced when a narrow strip tries to reproduce a broad movement. I approve the visual intention, not a slogan.
Choose the Finished Depth and Corner Geometry
The drawing needs actual slab thickness, finished edge depth, return width, inside relief if any, corner radius or arris, visible joint position, underside transition, and support. I also mark which surfaces receive the same finish.
A Marble Vanity Countertop Approval: Sink Cutouts, Veins, Light, and Batch Tone matters when the miter runs near a sink cutout. The remaining front strip, basin mounting, cabinet rail, faucet, and handling route can change whether the proposed deep edge is sensible.
| Approval point | Face evidence | Return evidence | Reason for rejection or rework |
|---|---|---|---|
| Material zone | Full face and final crop | Strip source marked on same slab or approved match | Background or movement changes abruptly |
| Vein direction | Vein meets corner at recorded point | Return continues or resolves intentionally | Line dies, jumps, or reverses without design intent |
| Joint color | Face tone under project light | Adhesive and fill trial at full scale | Joint reads warmer, darker, or opaque |
| Geometry | Straightness, arris, edge depth | Miter closure and underside transition | Open joint, lipping, sharp corner, or inconsistent depth |
| Befejezés | Polish or hone across main plane | Reflection continues around edge | Return flashes differently under side light |
| Repeat work | Approved corner code and slab map | First production piece beside control | Workshop repeats dimensions but loses visual standard |
The return strip must be chosen before the hero piece leaves the slab
Mark the main face and the return on the same scaled slab photograph. Cut a full-depth trial from the intended visual zones, close the miter dry, then apply the proposed adhesive and finishing method. If the strip comes from random leftover material, the project has already surrendered control of tone and vein movement at the closest viewing point.
Reserve the edge strip during slab layout, not after the main face has consumed the useful material.
Approve the White Marble Lamination Joint at Full Scale
A small glue chip cannot show a long line. I need a representative corner with the actual face finish, edge depth, strip source, adhesive color, reinforcement or support method, shaping, and final polish.
A white marble lamination joint may look acceptable under 4000K warehouse light and warmer under a 3000K vanity lamp. Lighting lies. I rotate the sample and let light travel across the joint instead of judging one front photograph.
A Statuario fehér márvány face can make a slightly warm adhesive line obvious because the field is pale and the movement is clean. The trial needs the specified joint width and cleanup method, not a hand-held dry fit.

Resin and repair zones change the corner
Slabs may contain resin-treated fissures, filled pinholes, mesh, patches, or local repairs. If the miter cuts through one, the saw, adhesive, polish, and light can reveal a different line. I mark those zones before nesting the return.
Do not call every visible line a natural feature. Compare it with the approved slab photographs and physical control. Natural movement, prior resin, new adhesive, and finishing marks have different acceptance questions.
Read the Finished Edge under the Light That Will Expose It
Mitered marble edge lighting is usually strongest from above or the side. A vanity mirror lamp can run a bright line along the arris. A pendant over a table can make one return look darker. I reproduce the dominant direction during inspection.
A Statuario Marble Slab Approval: Photos, Lighting, and Bathroom Use provides the wider photo and lighting method. For the miter, I add a slow video around the corner and close stills of the joint, vein turn, reflection, underside, and end condition.
A Carrara fehér márványlap may have fine linear movement. If the return strip rotates ninety degrees without a planned transition, that fine grain can expose the construction more than a dramatic vein would.
Control Repetition without Pretending Every Corner Is Identical
The first approved corner establishes geometry, joint appearance, adhesive, finish, acceptable natural variation, strip selection method, and inspection light. Production still needs the slab map because each corner meets different movement.
White marble mitered edge matching should be checked at the start of each material group and whenever the slab character, adhesive, abrasive sequence, finish, or edge depth changes. One control cannot govern a visibly different batch.
A Calacatta Marble Batch Matching for Hotel Bathrooms helps assign related tone and movement before fabrication. I do not mix a warmer return into a cooler hotel room group because the strip was convenient.
When a Mitered Edge Arrives with the Wrong Tone or Vein
First, photograph the complete piece, corner, joint, underside, code, and room light. Second, stop installation or repair of matching pieces. Third, compare the slab map, return-strip source, approved corner, adhesive record, finish, and inspection photographs with the supplier.
Possible actions include cleaning, controlled refinish, approved repair, reassignment, remake, or acceptance. I do not choose until the team knows whether the difference comes from material zone, adhesive, resin, polishing, geometry, or light.
Release White Marble Mitered Edge Matching as a Paired Set
Minden white marble mitered edge matching record identifies the main face and its reserved return strip. I do not let the workshop choose a visually convenient offcut after the top has been cut.
For repeated vanities, white marble mitered edge matching needs an approved range rather than one flawless corner. I compare several pieces under the same light before setting the acceptance boundary.
The finished white marble mitered edge matching inspection includes both long and short returns. A convincing front can still fail where the vein turns at the side.
Before packing, white marble mitered edge matching is photographed from standing height and close range. I want the project to see composition, joint color, and reflection without changing the camera angle.
The second marble miter vein alignment check happens after shaping and polishing. I confirm that the finished arris has not removed the narrow visual bridge approved at dry assembly.
Under the specified mitered marble edge lighting, I place the corner beside the approved door, metal, or wall finish. Warm surroundings can expose a resin line that looked neutral in the warehouse very clearly.
Frequently Asked Questions
1. What is a mitered edge on a marble top?
It is a fabricated corner where the main face and a return piece meet, often making a thinner slab appear deeper. The assembly needs controlled geometry, strip selection, adhesive, finish, support, and handling.
2. Must the vein continue perfectly around a marble miter?
No. It should continue, soften, or resolve according to an approved visual intention. Exact continuation may be impossible or unattractive for some vein shapes. Mark the face and return on the slab before cutting.
3. Why does a marble miter joint look yellow under bathroom light?
The adhesive or fill may read warmer than the stone, or the material zones may differ. Evaluate the full-scale trial under the specified 3000K or 4000K light and check residue, resin, and polish as well.
4. How is white marble mitered edge matching approved?
Approve a full-scale corner from marked slab zones with the actual depth, adhesive, joint, finish, vein direction, underside, and lighting. Keep it as the physical control beside the first production pieces.
5. What should happen first when a delivered miter does not match?
Photograph the whole piece, corner, joint, underside, code, and installed light, stop related installation or repair, and compare the slab map, strip source, approved corner, adhesive, and inspection evidence.
Quick-Reference Mitered Edge Checklist
- Mark the main face and every return strip on the numbered full-slab photograph.
- Draw actual thickness, finished depth, joint, arris, underside, and support condition.
- Produce a full-scale corner with the proposed adhesive, finish, and strip source.
- Inspect vein transition, joint color, resin, lipping, polish, and corner comfort.
- View the trial under 3000K, 4000K, and the dominant project light direction.
- Keep the approved corner beside first production pieces from each material group.
Final Conclusion
Fehér márvány mitered edge matching is controlled on the slab map, proved in a full-scale corner, and accepted under the final light. Reserve the strip, draw the geometry, test the adhesive, inspect the reflection, and keep the physical control through production.
Esta Stone would rather lose a narrow return strip in layout than accept a warm glue line across every finished vanity.

References
- Dimension Stone Design Manual, Natural Stone Institute.
- Natural Stone Institute Technical Bulletins for Marble, Natural Stone Institute.
- ASTM C503 Standard Specification for Marble Dimension Stone, ASTM International.
- ASTM C97 Standard Test Methods for Absorption and Bulk Specific Gravity of Dimension Stone, ASTM International.
- ASTM C880 Standard Test Method for Flexural Strength of Dimension Stone, ASTM International.
- Bathroom Planning Guidelines, National Kitchen and Bath Association.