



White Marble Refinishing: When Cleaning Is No Longer the Answer
A polished white marble vanity returned to our warehouse looking grey across the front edge. The complaint called it dirt. Under overhead light, the surface did look cloudy. I cleaned a controlled section, dried it and moved a lamp low across the face. Hundreds of fine scratches appeared where toiletries had been dragged toward the basin. Cleaner could remove residue, but it could not put the polish back. Lighting lies when it hides the direction of damage.
The same mistake happens on bathroom floors. A team keeps washing a pale traffic lane, then changes chemicals because the lane stays dull. The repeated cleaning may strip residue, expose more contrast and leave the surrounding area shinier. By then, the original question has been lost: is the surface dirty, etched, scratched, worn, stained or physically damaged?
The answer controls the remedy. White marble refinishing changes the stone’s surface mechanically. Cleaning removes foreign material. A poultice tries to draw certain stains. Sealing may reduce absorption, but it does not restore gloss or erase an acid mark. I separate those jobs before anyone opens a bottle or brings a machine onto the floor.
Start White Marble Refinishing with a Defect Map
I mark every affected area on a room elevation or floor plan before deciding what to do. The map records location, dimensions, stone code, finish, lighting direction, nearby fittings, moisture source and visible boundary. A dull ring beneath a soap bottle is not the same event as a two-metre traffic path.

Use front light, raking light and the actual room light. Raking light exposes scratches, lippage and waviness because shadows form across tiny height changes. Front light helps compare tone. The installed 3000K fixture may warm the stone and soften a defect that becomes obvious under a 4000K inspection lamp. Record both instead of arguing from one photograph.
For Carrara white marble slab, fine grey movement can disguise light scratching from one direction and reveal it from another. Do not circle every natural vein as damage. Compare the area with approved full-slab photographs and an unaffected installed piece.
Describe appearance without guessing the cause
Write what the surface does: dull under raking light, darker after wetting, rough to the fingertip, glossy around the perimeter, pale at a chemical splash, scratched in one direction or uneven across tile joints. Avoid writing “bad polish” before testing. That label pushes the team toward a remedy too early.
I also note whether the defect crosses pieces. A mark that continues across grout joints may come from cleaning equipment or applied residue. A cloudy patch confined to one tile may relate to finish variation, repair, moisture or local exposure. Pattern is evidence.
Rule Out Residue, Moisture, and Surface Films
Before white marble refinishing, establish a clean and dry baseline. Follow current stone-care guidance for a small control area. Dirty mop water can move residue from one tile to the next and create a false haze.
그리고 White Marble Grout Haze record is relevant when cloudiness appeared after installation. Cementitious or resinous residue needs identification. An aggressive acidic remover can etch calcite-rich marble while appearing to remove the haze. The new dullness then hides beneath the old complaint.
Moisture needs patience. A darker patch beside a shower joint may lighten as the assembly dries, or it may return after use because water still enters. Refinishing a wet face does not repair a failed joint, drainage path or substrate. I stop surface work until the moisture source and drying condition are documented.
Applied coatings, waxes and uneven sealer residues can also distort sheen. A small compatibility test may show whether a removable film sits above the stone. Do not assume every shiny patch is healthy marble and every dull patch needs grinding.
Separate Etching from Staining
White marble contains calcite, which reacts with common acids. Citrus, some bathroom cleaners and personal-care products can alter the surface. The result often looks pale or dull because light no longer reflects from the same microtexture. That is etching, not dirt trapped in the stone.
A stain changes color within or below the surface. It may remain dark, yellow, brown, pink or grey after drying. Touch alone may reveal no texture change. The White Marble Rust Stains process deals with metallic discoloration and source investigation, while a finish repair deals with altered surface texture.
Sometimes both occur. A toiletry bottle can leak an acidic, colored liquid that dulls the polish and leaves a tint. The team then needs a staged test: identify and address the stain without spreading it, allow complete drying, and only then judge the finish. Refinishing first may make later color comparison harder.
Don’t just look at samples. A small sample cannot show how repeated etch marks read across a continuous vanity run or lobby floor. Full-area light turns isolated dull points into a visual rhythm, especially beside polished pieces.
Read Scratches, Wear, and Edge Damage
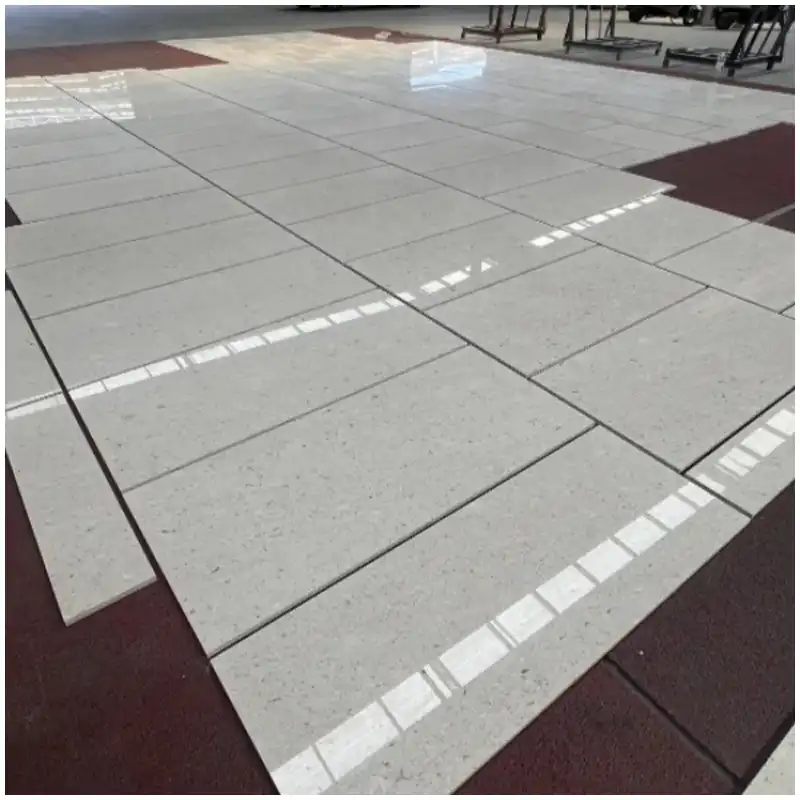
Fine scratches usually show direction. Around a basin, they may follow cleaning strokes or the path of trays. On a floor, they often follow traffic and grit movement. A polished surface scatters light along each line, while a honed surface can hide shallow scratches until viewed across the light.
Polished marble scratches need depth and distribution assessment. One isolated line may accept a local professional correction. Hundreds of overlapping lines across the use zone may require a broader blend. A spot polished too tightly can create a bright island that looks worse than the original scratch.

Edge chips are different again. A chipped vanity front may need a repair, edge reworking or piece replacement depending on depth, location, support and visual standard. Surface honing cannot restore missing geometry. That slab doesn’t belong next to your bathtub if an exposed repair edge cannot tolerate daily wet use and cleaning.
Wear is cumulative. A high-traffic floor may lose sheen gradually through grit abrasion. Compare protected corners with the walking line, but remember that corners may also hold cleaner residue. Clean both control areas before judging the finish difference.
Match the Repair Scope to the Existing Finish
A polished finish, honed finish and textured finish need different restoration methods and acceptance criteria. The specialist selects abrasives, sequence, equipment, slurry control and final treatment for the actual stone. I do not prescribe a universal grit sequence in an article because material response and desired finish differ.
Honed marble restoration aims for a uniform, low-reflection surface rather than gloss. The difficulty is not merely removing the mark. It is matching texture and color across the repair boundary. A patch can feel smooth yet flash brighter under side light.
Polished work has another risk: reflection reveals waves and local overworking. Large tiles or long vanity tops make this obvious. Ask the specialist how far the working area must extend to blend the result. The answer may be one piece, one bay, a complete top or a defined floor zone.
For Statuario white marble, bold veins can help disguise a repair boundary in one location and make it obvious in another. The vein does not change the technical need, but it affects where a visual transition can be accepted.
Use a Restoration Decision Table
| Observed condition | First verification | Likely work route | Do not approve yet if |
|---|---|---|---|
| Cloudy film wipes unevenly | Controlled cleaning and rinse test | Residue removal | Stone remains wet or cleaner is unknown |
| Dull splash with changed texture | Dry raking-light inspection | Professional finish correction | Color stain remains inside the area |
| Directional fine scratches | Depth and distribution map | Local or zone refinishing | Spot blend would create a sheen island |
| Dark patch near wet joint | Moisture source and drying check | Resolve moisture before finish work | Darkness returns after use |
| Worn traffic lane | Cleaned control comparison | Defined-area restoration | Slip or lippage issue is unresolved |
| Chip or open repair | Geometry, support and repair review | Repair, rework or replacement | Missing material is treated as a finish defect |
The Hard-Won Lesson: Stop Cleaning When the Defect Has Texture
A hotel vanity mock-up had a dull crescent beside the basin. The maintenance team cleaned it three times with progressively stronger products. Under 4000K inspection light, the crescent had widened and the polished field around it had become uneven. A dry raking-light check showed an etched surface, not retained dirt. The later restoration had to cover a larger area so the polish could be blended.
The Lesson: When a dry mark changes surface reflection or texture, stop chemical escalation and classify the finish damage first.
Approve a Test before White Marble Refinishing
그리고 white marble refinishing test needs a representative but controlled location. It should contain the actual stone, finish and defect without sitting in the most visible centre of the room. Record boundaries, tools, materials, passes, water control, slurry collection, observation light and result.
I judge the dry test beside an untreated control and an accepted reference. Check tone, sheen, texture, flatness, vein clarity, repaired areas and edge transitions. View it close, at normal standing distance and from the doorway. Lighting lies, so use the room fixtures as well as a controlled inspection source.
그리고 White Marble Protection after Installation becomes important immediately after approval. Restoration can leave a clean surface exposed to dust, metal wheels, tape residue and other trades. Define curing or drying restrictions, protection material, access route and removal responsibility.
For a large batch, use a reference panel or approved bay. The specialist follows the accepted method, while inspection checks consistency at agreed intervals. Do not wait until the entire floor is finished to discover that morning and afternoon crews produced different sheen.
Know when replacement belongs in the discussion
White marble refinishing cannot correct every defect. Deep cracks, unstable repairs, severe lippage, open fissures, incorrect thickness, structural movement, contaminated joints or unacceptable color variation may need another remedy. The supplier, restoration specialist, installer and project designer should define responsibility from evidence.
A feature vein cut by a deep gouge may remain visually unacceptable after the surface becomes smooth. Replacement can preserve design intent better than an extensive repair. Conversely, replacing a sound piece may create a worse batch mismatch. I compare both risks.
Control Water, Slurry, Edges, and Adjacent Finishes
White marble refinishing creates water and slurry. Protect cabinets, metal trims, painted walls, drains, electrical fittings, grout, sealant and porous adjoining materials. Confirm where slurry goes and who cleans it. Do not wash stone slurry into a completed drain without site approval.
Edges deserve separate attention. Machines may not reach tight corners, vertical faces or sink cutouts with the same motion used on the field. Handwork needs its own accepted appearance. A bright edge beside a honed top looks unfinished even when both surfaces pass separately.
Floor work must account for transitions, thresholds and fixtures. A restoration process should not round tile edges, expose lippage or alter slope. If traction is part of the floor requirement, the project team verifies that the resulting finish and maintenance method fit the applicable specification.
The marble surface remains chemically sensitive after restoration. A renewed polish is not a license to use acidic cleaners. Hand the maintenance team the approved cleaning method and a list of prohibited products.
Close the Restoration Record
그리고 white marble refinishing closeout contains the defect map, source photographs, cleaning test, moisture observations, approved reference, specialist method, test results, work boundaries, inspection, protection record, final images and maintenance instruction. I also record areas not treated and why.
Photographs need fixed positions and consistent light. A phone that changes exposure can make the after image look whiter without proving better finish. Include a broad room view and raking-light details. Use the same orientation before and after.
For Calacatta Gold marble slab for bathroom use, strong warm veins can pull attention away from a slight sheen shift in one photograph. Inspect the quiet white fields too. They reveal local overworking quickly.
What to do when the finish still fails
First photograph the complete dry area under controlled and room light. Second, stop further cleaning, polishing and installation activity around the affected surface. Third, send the supplier and restoration specialist the original approval, defect map, treatment log and comparison images. Preserve the failed test so the next decision uses evidence rather than memory.
Frequently Asked Questions
1. When is white marble refinishing necessary?
It becomes appropriate when a properly cleaned and dry surface still has a physical finish defect such as etching, scratching, wear or inconsistent sheen, and a controlled professional test proves that mechanical restoration can produce an acceptable blend.
2. Can polishing remove a stain from white marble?
Polishing changes the surface finish; it does not automatically remove discoloration held within the stone. Identify the stain and stop its source first. A stain treatment may precede finish correction, followed by complete drying and visual assessment.
3. Can one etched spot be repaired without refinishing the whole top?
Sometimes, but the answer depends on finish, location, stone response, defect depth and light. A tight repair can leave a bright or dull island. Ask a qualified specialist to test the smallest area that can blend naturally.
4. Does sealer restore a polished marble finish?
No. An impregnating sealer may reduce absorption when suitable, but it does not replace removed polish or erase scratches. Some applied products can also alter appearance, so test compatibility and finish before broad use.
5. What should I do first if restored marble looks uneven?
Photograph the dry surface under front, raking and room light, stop further work, and compare the result with the approved reference and restoration record. Then ask the supplier and specialist to decide whether blending, another controlled pass or replacement is justified.
Quick-Reference Finish Decision
- Map every defect under front, raking and room light.
- Clean and dry a control before naming the defect.
- Separate staining from etching, scratching and wear.
- Test the proposed restoration on the actual finish.
- Approve the blend at room scale, not only close up.
- Protect edges, joints, cabinets and drains during work.
- Close the record with matched before-and-after photographs.
Final Conclusion
White marble refinishing should begin only after cleaning, drying and defect classification prove that the surface itself has changed. Map the condition, distinguish stains from etching, test the real finish, approve the blend at room scale and protect the completed work. Don’t just look at samples; I would rather reject one weak restoration test than let Esta Stone sign off an uneven floor that every bathroom light will reveal.
References
- Natural Stone Maintenance and Restoration, Natural Stone Institute.
- Dimension Stone Design Manual, Natural Stone Institute.
- ASTM C503 Standard Specification for 마블 Dimension Stone, ASTM International.
- Guide to Best Practice on the Cleaning of Internal and External Masonry Surfaces, Stone Federation Great Britain.
- Natural Stone Installation in Bathrooms, Shower Enclosures and Wet Rooms, Stone Federation Great Britain.
- TCNA Handbook for Ceramic, Glass, and Stone Tile Installation, Tile Council of North America.
- Bathroom Planning Guidelines, National Kitchen and Bath Association.
- Creating Helpful, Reliable, People-First Content, Google Search Central.