White Marble Efflorescence: Find the Moisture Path before Cleaning
A chalky line sits at the lower joint while the center of the panel remains clear. Under side light, the deposit looks granular rather than oily. I put the area on hold because white marble efflorescence records moisture movement, and cleaning the face can erase the best clue before anyone finds the route.
I start with a dry photograph, a close view, a room view and the date. Then I mark nearby drains, plumbing penetrations, wet walls, floor falls and construction joints. The deposit may be simple to remove later. The source is the serious part.
Start White Marble Efflorescence Diagnosis with the Pattern
Location changes the diagnosis. A line that follows every joint points toward the bedding or grout system. A bloom at one corner suggests a local water route. A band rising from the floor asks for checks at the base, waterproofing transitions and adjacent wet construction.

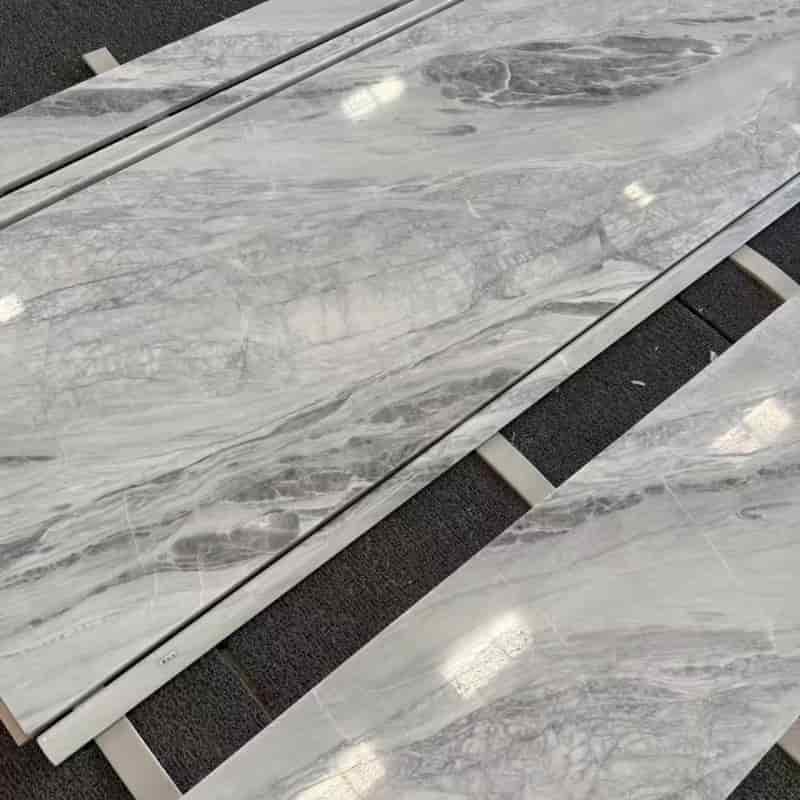
Svetainė White Marble Slabs: Complete Guide to Types, Selection, Price, Bathrooms, Lighting, and Batch Control fixes the accepted stone range. I compare the affected face with approved full-slab photographs so a natural pale inclusion is not confused with a new surface deposit.
Separate Marble Salt Deposits from Haze, Dust, and Cleaner Residue
A dry, crystalline powder that returns after wiping behaves differently from grout haze, construction dust, wax or detergent film. I do not identify it from color alone. Touch, location, solubility and recurrence matter, and a qualified testing party may need a small sample.
White marble efflorescence can appear bright on honed stone and less obvious on a reflective polished face. Lighting lies about contrast. Move the inspection light across the surface and photograph the texture before adding water or chemicals.
Do not acid-clean a calcite surface
Marble is largely calcite, a mineral that reacts with acid. The factual background is described in marble references, but the site decision is straightforward: an acidic efflorescence cleaner that suits masonry can etch white marble. Product compatibility must be tested on a spare piece.
Trace the Moisture Route before Treating White Marble Efflorescence
Water can enter from room use, incomplete curing, a leak, a wet substrate, wash-down, exterior exposure or an adjacent trade. I ask when the area first became wet, how long it stayed covered and whether the deposit changes after use or dry weather.
A moisture reading is useful only when the instrument, method and comparison area are recorded. Different materials respond differently to meters. The installer or building specialist should interpret the assembly, while my stone record establishes what changed on the visible face.
| Observed condition | Check next | Do not assume | Hold point |
|---|---|---|---|
| Powder follows several joints | Grout, bedding, curing water and wash history | The marble batch released salt | Pause cleaning until the source is mapped |
| Deposit sits at one corner | Penetration, slope, leak and adjacent wet work | The full room has failed | Isolate local wetting and document recurrence |
| Lower wall band repeats | Base detail, waterproofing transition and floor moisture | It is ordinary bathroom dirt | Ask the installation team to inspect the assembly |
| Film does not return | Cleaning product, grout haze and construction dust | Every white residue is efflorescence | Test one controlled area |
| Stone remains dark after powder removal | Drying, adhesive contact and trapped moisture | Sealer will force it dry | Do not coat a wet condition |
The powder disappeared but the wet line remained
A small cleaning test removes the loose white deposit, yet the lower edge stays darker than the approved dry face. The visible evidence now separates into two conditions: soluble material on top and moisture or setting-material influence below. Treating only the powder would make the photograph look better while leaving the water route untouched.
The Lesson: Preserve the pattern, stop the moisture, prove drying, and only then approve the cleaning method.
Check the Substrate and Setting Bed without Blaming the Stone
Cementitious materials can contribute soluble salts, but that statement does not identify the source in a specific room. The installer checks the specified assembly, curing, coverage, membrane, joints and penetrations. I provide stone type, finish, thickness and production treatment.
When Carrara marmuro plytelės move from a dry warehouse into a wet installation, shade can deepen temporarily. That darkening is not automatically damage. A drying record must show whether the face returns toward its approved condition.
Use White Marble Efflorescence Records to Control Cleaning
White marble efflorescence cleaning begins with the mildest compatible dry method. Loose material may be collected for identification. Water, alkaline products, poultices or specialist treatments come only after the source, stone finish and test result are known.
The published White Marble Protection after Installation explains why trade dust and coverings need separate control. A protective sheet can trap moisture or hide recurrence, so the affected area needs an agreed observation window before it is covered again.
Record Drying instead of Guessing from One Photograph
I photograph the same marked area under the same light and camera position. The record includes room use, recent cleaning, ambient conditions where available and whether adjacent work remains wet. Random phone images from different angles cannot prove improvement.
A moisture path diagnosis needs the installation team, waterproofing party or building specialist when the route sits behind the finish. Esta Stone can judge the approved stone face and fabrication record, but it cannot certify concealed building work from a surface photograph.
Decide Whether the Marble Can Stay
Stone replacement makes sense only when the source is controlled and the remaining visual or physical condition falls outside the accepted standard. Replacing a panel while the wall remains wet simply supplies a new witness to the same problem.
White marble efflorescence alone does not prove the stone is defective. Acceptance depends on the cleaned, dry condition, any etching or discoloration, joint integrity and the documented cause. That decision belongs in one written closeout.
A Practical Answer for Repeated Bathroom Areas
Map
Number every affected room and mark the exact deposit position on a simple elevation. Patterns across repeated rooms can distinguish a common detail from isolated site exposure.
Test
Select one representative area, stop the water source, observe drying and test the least aggressive compatible cleaning method. Keep an untouched comparison beside it.
Release
Release wider cleaning only after the responsible team accepts the cause, method and dry result. If the powder returns, reopen the moisture investigation rather than increasing chemical strength.
Build a Room-by-Room Deposit Register
Repeated bathrooms need more than a folder of close-up photographs. I use one row per room and one marked elevation per affected surface. The row records first observation, dry or wet condition, deposit position, joint relationship, recent cleaning, plumbing use, nearby construction and current hold status. That format lets the team sort by common wall, floor level, wet-area detail or installation date.
If several deposits align at the same height, the site team has a useful pattern to investigate. If one isolated room differs, it stays a local case until evidence says otherwise. I do not turn three similar photographs into a claim about every room. The register should show both affected and checked-clear areas so the denominator remains visible.
Collect a Sample without Destroying the Surface
Loose powder may be collected with a clean, nonmetallic tool into a labeled container when the responsible specialist requests it. The label carries room, position, date and whether the face was dry. I do not scrape polished marble aggressively or add water first, because either action can change the material and mark the finish.
A sample can support identification, but it does not explain how moisture reached the face. Laboratory or conservator findings must return to the room map, installation section and water history. Otherwise the project learns what the deposit contains and still knows nothing about why it formed at that corner.
Review Joints, Penetrations, and Floor Falls
At showers and vanity walls, I inspect sealant transitions, pipe penetrations, niches, channels, thresholds and the line where wall stone meets the floor. The inspection team checks whether water drains as intended and whether joints remain open or cracked. A dry stone photograph cannot certify any of those concealed details.
Floor deposits deserve a fall and pooling record. Water that sits along one edge can feed repeated evaporation even when the waterproofing layer remains intact. The correction may involve use, drainage or a joint detail rather than stone treatment. That is why the room elevation and installation drawing belong beside the surface images.
Keep Cleaning Trials Small and Comparable
I divide the test into an untreated control and one or more clearly labeled methods. Each method records product, dilution, contact time, tool, rinse, extraction and drying period. Photographs use the same light after the face is fully dry. A wet test patch almost always looks darker and cannot be compared fairly with a dry control.

The test result includes more than deposit removal. I inspect polish, honed texture, color, joint edge, residual halo and recurrence after the observation window. A method that removes powder but changes the finish is not a clean pass. A method that looks good for one hour and blooms again is not a closed diagnosis.
Separate Stone Release from Building Release
The stone supplier can compare the final face with approved visual records. The installer can explain setting materials and workmanship. The waterproofing or building team addresses concealed moisture routes. The maintenance team controls cleaners and room use. One party may coordinate the record, but it should not sign outside its competence.
I state these boundaries because pressure for one quick answer often produces the wrong answer. A surface can be visually acceptable while the wall still needs a moisture repair. It can also be technically dry yet remain etched or stained beyond the approved appearance. Both decisions need closure.
Decide when a Poultice Trial Is Relevant
A poultice is not the automatic next step for a crystalline surface deposit. It may introduce more moisture, change an adjacent joint or pull other material toward the face. A qualified stone-care specialist should select the method only after the deposit and substrate condition are understood.
When a trial is authorized, matching spare stone is the first choice. If no spare exists, use a discreet, documented area and preserve a nearby control. Record the full dry-back period, because a temporarily dark patch can make the treatment look worse or better before equilibrium returns.
A quiet Sivec White marble tile control can also reveal a faint residue that stronger veining would hide, provided it comes from the actual approved range.
Write an Acceptance Standard for the Final Dry Face
The closeout states that loose residue is removed, the source action is complete, the surface has reached the agreed dry observation point, and no new deposit has appeared during that window. It also records any remaining etch, shadow or color change and who accepts it under the project lighting.
For repeated rooms, the approved method includes sequence and stop conditions. If a worker sees a different pattern, stronger recurrence or finish change, work stops and the issue returns to review. A cleaning instruction without a stop rule can turn one controlled test into widespread surface alteration.
Retain the final room map with maintenance instructions and the original inspection photographs.
Dažnai užduodami klausimai
1. What causes white marble efflorescence?
It forms when moisture dissolves soluble material, carries it toward the surface and leaves a deposit after evaporation. The salts may relate to cementitious materials, construction water or another source, so the pattern and assembly must be checked before assigning cause.
2. Can I remove the white powder with an acid cleaner?
Do not assume a masonry efflorescence product is safe on marble. Acid can etch calcite-rich stone. Preserve the evidence, stop the water route and test the mildest compatible method on a spare or controlled area.
3. Does efflorescence mean the marble slab is defective?
No. A surface deposit is evidence of moisture and soluble material, not proof of a quarry defect. Compare the stone with its approval record and investigate the substrate, joints, waterproofing, cleaning and wet-use history.
4. How do we prove that the wall is drying?
Photograph the same marked location under the same light, record recent wetting and use a documented measurement method interpreted by the responsible installation or building specialist. One changing phone photograph is not enough.
5. What should the team do first when the deposit appears on site?
Photograph the dry deposit and room context, stop cleaning or installation around the affected area, preserve samples where useful, and contact the supplier and installation team with the original slab, setting and inspection records.
White Marble Efflorescence Field Checklist
- Photograph the deposit before touching it.
- Mark joints, penetrations, drains and nearby wet work.
- Compare the face with approved slab or tile records.
- Stop the moisture route before cleaning trials.
- Test the mildest stone-compatible method on one area.
- Record drying from the same position and light.
- Release wider work only after written cause and method approval.
Final Conclusion
White marble efflorescence needs a moisture investigation before it needs a stronger cleaner. Preserve the pattern, compare the approved stone, trace the assembly, prove drying and test one compatible method.
Lighting lies, but recurring salt does not; Esta Stone keeps the affected face on hold until the water path and dry acceptance are both recorded.

References
- Efflorescence and Moisture Guidance for Natural Stone, Natural Stone Institute.
- Dimension Stone Design Manual, Natural Stone Institute.
- Installation Guide and Reference Manual, Natural Stone Institute.
- ASTM C503 Standard Specification for Marmuras Dimension Stone, ASTM International.
- ANSI A108 and A118 Installation Standards, Tile Council of North America.
- TCNA Handbook for Ceramic, Glass, and Stone Tile Installation, Tile Council of North America.