

Large-Format White Marble Shower Walls: Veins, Joints, and Dry-Lay
I stopped a hotel shower dry-lay because panel B03 had been rotated 180 degrees. The background still matched, and every dimension was correct. But a grey vein that should have climbed through the mixer wall now dropped into the niche and ended against a pale panel. The cutter called it a small orientation issue. Across a three-panel wall, it looked like a broken sentence.

Large-format white marble shower walls leave nowhere for lazy sorting to hide. Don’t just look at samples. A panel can be beautiful alone and wrong in the elevation. I need numbered full faces, measured openings, vein arrows, corner relationships, joint widths, finish, and a complete dry-lay before anything enters a crate.
A project using Плиты из мрамора калакатта must approve the actual available faces. The name does not tell me whether a niche will remove the best vein or whether two wall backgrounds will turn warm and cool under the bathroom lights.
Start large-format white marble shower walls with measured elevations
I want every wall, not one decorative rendering. Show finished floor, ceiling, substrate build-up, waterproofing zone, corners, door, glass, channels, mixer, shower rail, head, hand spray, niches, shelves, bench, access panels, drains, movement joints, trims, and every service penetration.
Then mark what can still move. A niche may shift during coordination. A glass channel may depend on final tile build-up. A plumbing centre may be fixed. If the drawing does not distinguish those conditions, the slab layout will be approved against a target that keeps changing.
Lighting lies. I compare the elevation with the actual lighting plan because joints and vein contrast can read differently under a downlight, concealed niche light, daylight, or warm evening scene. The wall centre in a bright rendering may not be the first thing a guest sees from the bathroom door.
That slab doesn’t belong next to your bathtub when the architect loves only one cropped corner and has not seen how the complete face meets the adjacent wall. The same rule applies to a shower. Approve the room, not a social-media crop.
Overlay panel outlines on complete slab photographs
Each outline carries wall code, panel number, top, bottom, face direction, finished dimensions, joint side, cutouts, edge finish, and revision. I keep safe fabrication margins and mark natural features or repairs that may affect a narrow bridge around a fitting.
For a calmer wall using Плита из белого мрамора Carrara, vein scale may appear smaller, but batch tone and direction still matter. Do not scatter related panels across random slabs simply because the veins look quiet from a distance.
| Dry-lay checkpoint | Warehouse record | Pass condition |
|---|---|---|
| Panel identity | Room, wall, panel, slab origin, top, face, revision, and permanent edge mark | Every piece maps to one position without relying on paper labels alone |
| Background range | Full wall under even light, 3000K, 4000K, and approved daylight condition | Adjacent fields sit inside the signed warm/cool range |
| Vein direction | Elevation overlay, opening arrows, seam close-ups, corners, and niche returns | Movement follows the approved composition without accidental reversal |
| Fabrication | Dimensions, squareness, thickness, finish, cutouts, edges, backing, and repairs | Panels match the current technical drawing and accepted finish sample |
| Wet-zone interfaces | Joint sample, sealant colour, glass channel, fittings, shelf, slope, and maintenance access | The stone composition remains buildable after waterproofing and fixtures |
The Hard-Won Lesson: The niche consumed the only clean vein transition
A villa shower used two Calacatta panels with one elegant diagonal line crossing the centre. The slabs were approved before the final niche moved 140 mm to clear plumbing. Fabrication followed the revised niche drawing but not a revised slab overlay. The opening removed the centre of the vein, leaving two dark fragments that pointed at each other across an empty box. Re-selecting and cutting the wall added six working days.
The Lesson: Reissue the full-slab elevation every time a niche, fitting, joint, or glass channel moves.
Plan vein direction through corners and niches
An inside corner can continue movement, create a deliberate break, or expose a background mismatch. Decide which result the design expects. A bookmatched pair may suit one focal wall, while adjacent walls need controlled tone rather than forced symmetry.
I dry-lay corner panels at their intended relationship, not as separate flat rows. If the stone wraps a niche, show the back, sides, top, bottom, edge treatment, slope, and joint positions. A dark vein entering a 60 mm return can look like a stain when the rest of the niche is pale.
White Statuario Marble for wall panels can carry a strong direction. Don’t just look at samples. Turn the full slab image until the architect approves whether movement rises, falls, opens, or closes across the shower.
Fabricators need safe cutout shapes and support around openings. I will not give one universal radius or minimum bridge because slab condition, thickness, machinery, reinforcement, and the responsible fabricator’s method matter. The technical drawing must carry the approved detail.
Let joints solve construction problems honestly
Fewer joints can create a quieter wall, but oversized panels bring weight, handling, access, substrate, and replacement questions. Place joints where the architecture, panel size, movement system, installation route, and vein composition can accept them.
A joint hidden inside a vein may look discreet under warehouse light and become dark under a niche spotlight. Build the joint sample with actual grout or sealant colour and the specified finish. Lighting lies again.
Glass channels and metal trims need coordination before the panel edge is finished. A polished exposed edge, concealed edge, mitred return, or metal cover creates a different final line. Put the section beside the dry-lay photographs.
Build the complete shower dry-lay before packing
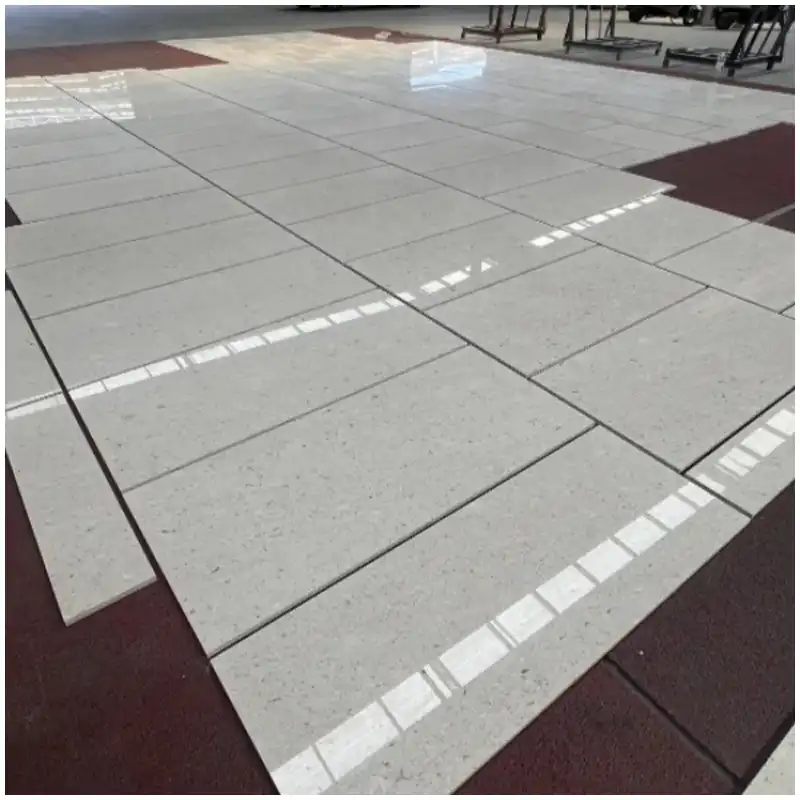
Dry-lay is not four panels leaning near each other. We reconstruct each visible wall at representative joint gaps, then bring corner relationships together. Every panel code and orientation arrow remains readable. We photograph the overall room sequence straight on and capture each joint, corner, niche, fitting cutout, finish, and repair.

Сайт Complete Project Guide to Premium White Marble Selection and Quality Control makes this factory record non-negotiable. Full faces establish the approved range. The dry-lay proves that cutting preserved it.
For a repeated package using Белая мраморная плитка Sivec, I build one reference room and a range board from the actual batch. The board shows acceptable backgrounds and vein levels without pretending every natural panel will be identical.
Under 4000K, a repair or polish variation may appear harder. Under 3000K, background differences can become warmer. We record both conditions and the specified site light. That slab doesn’t belong next to your bathtub if it only passes inspection with the warehouse lights dimmed.
Use permanent marks and photograph every packing layer
Paper labels get wet. Adhesive labels fall off. I require a permanent, non-damaging identification method on the approved edge or reverse position, coordinated with the installation team. The code includes room, wall, panel, top, and sequence.
Crates follow installation order where handling allows. Photograph the empty supports, every panel layer, face protection, edge restraint, labels, closed crate, and shipping mark. The site map tells installers which crate to open and which panel must remain protected.
Sivec White Marble and Carrara Supplier Bathroom Project Approval supports the batch and room-allocation decision before those labels are printed.
Control repeated shower rooms without creating a patchwork
Hotel floors need a room matrix. Group related slab backgrounds, then assign walls and rooms before cutting. Put the most closely viewed or connected panels together. Keep stronger vein ranges deliberate rather than scattering them as isolated surprises.
Each room type carries elevation revision, panel list, finish, joint, fitting cutouts, glass detail, batch group, dry-lay reference, crate, and replacement allocation. If one room changes, the revised code must not contaminate the standard batch.
At site, inspect the first complete room under operating light before repeating the floor. Check wall sequence, joints, corners, niche, glass, fixtures, wet-face appearance, and cleaning access. I would rather stop at room one than argue at room twenty.
Calacatta Marble Slabs: Mistakes to Avoid in Project Orders addresses sample-only approval and lost slab identity. Large shower panels magnify both mistakes, so keep the original full faces inside the site inspection file.
Understanding large marble shower panels in today’s white marble market
Why fewer joints demand more planning
One large panel carries more of the visual field, weighs more, needs a clearer handling route, and can be harder to replace. Reducing joints transfers responsibility into slab selection, fabrication, substrate, lifting, and mockup approval.
How white marble keeps its natural character across repeated rooms
Define a batch range, group related backgrounds, control vein direction, and assign expressive panels intentionally. Consistency means disciplined variation, not printing the same face again.
What to do when a panel arrives reversed or mismatched
First photograph the complete wall, panel codes, edge marks, crate label, lighting condition, and approved elevation. Second stop installation before trimming or fixing changes the piece. Third contact the supplier with the full-slab overlay, dry-lay, batch map, packing photographs, and inspection record. Do not rotate another panel to make the first mistake look intentional.
Frequently asked questions
1. What must be approved for large-format white marble shower walls?
Approve numbered full slabs, measured elevations, panel outlines, vein direction, backgrounds, corners, niches, fittings, joints, finish, dry-lay, labels, packing, and installation maps.
2. Should shower-wall veins run vertically or horizontally?
There is no universal answer. Test both orientations on complete slab images against room proportions, openings, corners, viewing direction, and the intended composition.
3. Can large marble panels eliminate every shower joint?
Panel dimensions, movement requirements, substrate, access, weight, handling, installation, and replacement strategy set practical limits. Use honest planned joints where needed.
4. Why is a factory dry-lay necessary?
It reveals background mismatch, reversed direction, broken vein transitions, incorrect cutouts, joint problems, finish variation, and coding errors before panels enter crates.
5. How should replacement shower panels be planned?
Map practical spares from the approved batch with parent-slab images, dimensions, finish, treatment, room relationship, edge work, and protected storage or crate identity.
Quick-Reference Shower Wall Dry-Lay Checklist
- Freeze measured elevations, wet-zone interfaces, fittings, glass, niches, and joints before slab layout.
- Overlay every numbered panel on full slab photographs with permanent orientation marks.
- Test corners, niche returns, joint samples, finish, and background under site-related light.
- Rebuild complete visible walls at representative gaps before packing.
- Photograph every dry-lay detail and each protected crate layer with codes visible.
- Inspect the first installed room before repeating the wall package across the project.
Final Conclusion
Large-format white marble shower walls succeed when measured elevations, full-slab overlays, vein direction, corners, honest joints, complete dry-lay, permanent labels, and installation maps agree. I keep our signed elevation beside the packing register until the first shower is installed. Don’t just look at samples, and never let a niche move without revising the stone layout. Lighting lies; Esta Stone would rather stop one reversed panel on the warehouse floor than let a broken vein become the first thing every guest sees.

Список литературы
7 Shower Trends Defining Bathrooms for 2026, Livingetc.
Dimension Stone Design Manual, Natural Stone Institute.
Natural Stone Care and Maintenance, Natural Stone Institute.
Technical Guidance on Natural Stone in Wet Areas, Stone Federation Great Britain.
TCNA Handbook for Ceramic, Glass, and Stone Tile Installation, Tile Council of North America.
Standard Terminology Relating to Dimension Stone, ASTM International.
Bathroom Planning Guidelines, National Kitchen & Bath Association.