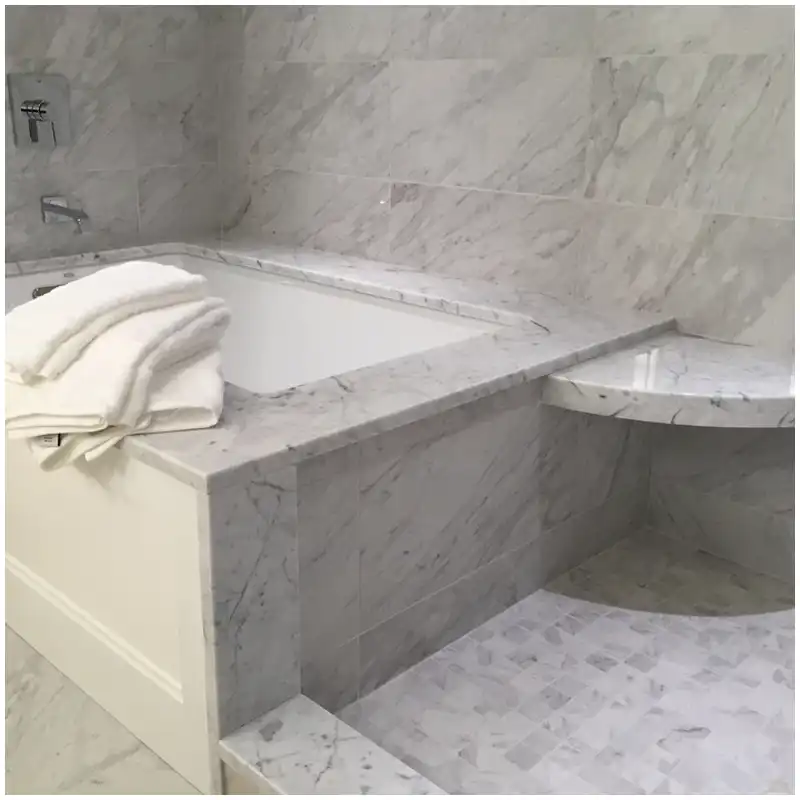




White Marble Tile Lippage: Is the Tile Wrong, or Is the Floor?
Look straight down at a dry-laid batch and it may seem calm. Move a flashlight low across the surface, and a dark line appears at every third joint. Some tiles are thicker, several corners lift, and the proposed narrow joint leaves little room for adjustment. White marble tile lippage is not a color problem, but pale stone makes the shadow brutally clear.
I check the tiles and the installation plane separately. Factory records can prove thickness and flatness at delivery. They cannot prove the site substrate, mortar-bed control, installer coverage, joint spacers, or final setting. Mixing those responsibilities helps nobody.
Measure White Marble Tile Lippage at the Joint
Lippage is the height difference between adjacent tile edges. I record the joint location, tile codes, direction, straightedge or gauge method, surface texture, and whether warpage or intentional slope affects the reading. A photograph alone rarely proves the height.

Сайт White Marble Slabs: Complete Guide to Types, Selection, Price, Bathrooms, Lighting, and Batch Control covers material and batch selection. Floor approval adds thickness, flatness, joint, finish, slip needs, substrate, lighting, and installation method to that selected range.
Marble is a metamorphic rock, but natural origin does not excuse uncontrolled machining. I expect the agreed manufacturing dimensions and documented variation, while recognizing that installation acceptance also depends on the project system.
Statuario Bianco marble tiles may carry long grey veins across a bright field. A raised edge can break both the physical plane and the visual continuation at the same joint.
Use more than one measurement
I sample center thickness, edge thickness, corner thickness, diagonals, face flatness, and corner behavior according to the agreed inspection plan. One reading at the center can miss a lifted corner or wedge-shaped piece.
A marble tile calibration record includes tool, method, sample size, piece codes, nominal dimension, agreed limit, and result. “Calibrated” printed on a carton is not an inspection report.
Separate Tile Geometry from the Substrate Plane
A flat tile installed over a stepped or hollow substrate can still finish uneven. Before work begins, the installation team checks the plane, slope, drains, thresholds, movement provisions, buildup, and transitions to other finishes.
Tile size and joint width change how white marble tile lippage appears over a measured substrate. Large pieces bridge local changes and reveal corners; smaller pieces follow the plane differently.
A Carrara marble tile floor may use a quiet repeated module. That repetition makes wandering joints and accumulated edge differences obvious across a long corridor.
| Inspection point | Factory evidence | Site evidence | Hold trigger |
|---|---|---|---|
| Толщина | Coded gauge readings across sampled tiles | Setting-bed plan and control piece | Spread beyond the agreed range |
| Flatness | Straightedge and corner observations | Substrate plane and trial installation | Rocking or lifted corners |
| Совместная | Size and squareness checks | Spacer, layout line, width, and alignment | Joint cannot absorb actual geometry |
| Slope | Not created by tile calibration | Measured fall to drain or transition | Local high edge conflicts with drainage |
| Lighting | Side-light dry-lay review | Final fixture direction and intensity | Edge shadows exceed accepted mock-up |
| Отделка | Gloss or hone consistency | Cleaning and any site finishing method | Local grinding changes surrounding appearance |
The Hard-Won Lesson: The Narrow Joint Removed the Installer’s Last Adjustment
Suppose the drawing reduces a planned joint after the stone has already been calibrated and the substrate checked to the earlier layout. Minor tile and site variation now accumulates across the grid. Corners begin to climb because the installer has no practical space to balance the module without breaking alignment at the doorway.
The Lesson: Approve tile geometry, substrate plane, joint width, and layout as one system before releasing the floor.
Use Dry-Lay to Check Geometry and Vein Direction
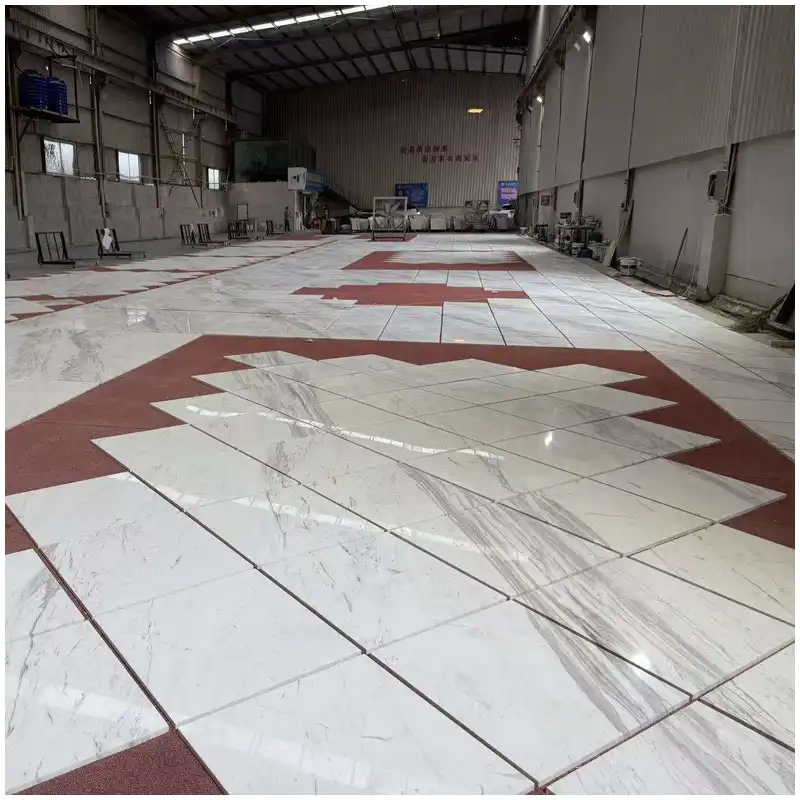
Dry-lay does not reproduce the setting bed, but it reveals size variation, rocking pieces, corner behavior, joint rhythm, vein orientation, tonal balance, and coded sequence. I use a flat reference surface and record any temporary shims so the photograph is honest.
A stone tile joint alignment check follows grids through doors, corners, drains, columns, and changes of room. A visually centered starting point can leave an impossible sliver at the opposite edge.
Сайт Carrara Marble Supplier for White Marble Project Orders explains batch and project-order controls. For floor work, I add calibration records and dry-lay geometry to the same approval file.
Approve the Mock-Up under the Light That Will Expose It
I want a trial area large enough to show several joints in both directions, a representative vein range, the actual setting method, grout, cleaning, and the final or simulated light direction. View it while standing and moving as well as from a close inspection angle.
Low and normal light tell different truths about white marble tile lippage. Grazing construction light can exaggerate every ridge, but final wall wash or daylight may also expose a repeated defect that overhead light hides.
White Volakas marble flooring tiles often show linear grey movement. I align the pattern intentionally, then make sure a mechanical high edge is not mistaken for a vein shadow.
Do not polish away an unresolved cause
Grinding and polishing can reduce some installed height differences when the specified system allows it, but they change face finish, edge definition, grout exposure, and sometimes the visual depth of the stone. The responsible team must approve that method before it becomes the default repair.

The first white marble floor flatness check belongs before stone installation. Correcting the tile face after setting does not fix a substrate or buildup problem underneath.
Inspect Production without Claiming Site Acceptance
At the warehouse, I can measure sampled tile geometry, count and code pieces, compare finish and batch range, check visible repairs, and arrange a dry-lay. I cannot certify the unbuilt substrate or installer execution from the packing floor.
For white marble tile lippage, I issue two records: factory dimensional evidence and a site mock-up requirement. The project acceptance document says where each responsibility starts and ends.
Сайт Calacatta Marble Slabs: Mistakes to Avoid in Project Orders warns against approving a dramatic material from small images. Floors add another warning: a beautiful slab range can still fail if piece geometry and setting conditions are ignored.
A second marble tile calibration review compares replacement or spare tiles with the production range. A later piece may match color yet sit high because its thickness basis differs.
Control Installation before Error Repeats across the Floor
I ask for setting-out lines, substrate acceptance, trial area, periodic plane checks, joint checks, coverage records where required, cleaning method, and protected curing. The installer marks a hold point before crossing into another room or repeated area.
The useful moment to catch white marble tile lippage is early enough to correct the method. Waiting until every room is complete turns one local warning into a repeated condition.
A second stone tile joint alignment check compares the installed grid with doors, walls, and the approved dry-lay. I do not accept straight joints that are straight to the wrong datum.
Escalate a Raised Edge with Measured Evidence
Photograph the full area under normal light, then mark coded joints and record measured height differences with the agreed tool. Stop polishing, filling, or continuing the affected method. Send the supplier and installation team the tile calibration, substrate acceptance, layout, mock-up, and installation records.
Once an edge is measured, white marble tile lippage must be traced to one tile, a run of thickness variation, warpage, substrate, buildup, joint choice, setting method, slope, or later movement. Different causes need different responses.
A white marble floor flatness record maps the area rather than reporting one bad joint. A local ridge and an overall wave are not the same defect.
I also mark the direction of the strongest light and normal walking route. That context helps the team judge a measured condition without turning every photograph into a different visual standard.
Release the Floor Standard before Packing
I identify the approved tile range, dimensional sampling, dry-lay revision, joint, setting-out principle, mock-up requirement, replacement basis, and protective handling. Crates keep codes and installation groups readable.
Before release, the white marble tile lippage record gives site teams the measurement method and acceptance basis, not just cartons of stone.
After final cleaning, white marble tile lippage is viewed under the agreed light. Lighting lies, but measured joints and a signed mock-up keep the judgment grounded.
My rule for white marble tile lippage is simple: do not blame one party until tile geometry, substrate plane, joint, light, and installation evidence are laid side by side.
Frequently Asked Questions
1. What causes lippage in a white marble floor?
Possible causes include tile thickness spread, warpage, raised corners, substrate variation, slope, joint width, setting method, accumulated layout error, or later movement. Measure before assigning cause.
2. Does factory calibration prevent all uneven joints?
No. Calibration controls tile thickness within an agreed basis. Site substrate, buildup, coverage, joint, layout, and installer execution still govern the finished plane.
3. Why does lighting make marble floor edges look worse?
Low-angle light casts shadows at height differences and can make small ridges appear continuous. Inspect under both diagnostic side light and the intended finished lighting.
4. How should white marble tile lippage be recorded?
Identify tile codes and joints, use the agreed measuring tool, map the affected area, photograph normal and grazing light, and link findings to calibration and site records.
5. What should happen first when raised marble edges appear?
Document the full area and measured joints, stop repeating or grinding the affected work, and compare tile, substrate, mock-up, layout, and installation evidence with the responsible teams.
Quick-Reference Marble Floor Checklist
- Measure sampled tile thickness, flatness, diagonals, and corner behavior.
- Accept the substrate plane, slope, buildup, and transitions before setting stone.
- Approve joint width and layout against the actual tile geometry.
- Dry-lay coded pieces on a known flat reference surface.
- Build a representative mock-up under the intended lighting direction.
- Check the plane and joints early before the method repeats across rooms.
- Record any repair or site finishing method before changing the marble face.
Final Conclusion
White marble tile lippage must be judged through measured tile geometry, substrate plane, joint choice, dry-lay, mock-up, installation records, and final light rather than one dramatic photograph.
Esta Stone stops at the trial bay until someone measures the floor; choosing a repair first only hides the cause.

Список литературы
- Dimension Stone Design Manual, Natural Stone Institute.
- ASTM C503 Standard Specification for Marble Dimension Stone, ASTM International.
- ASTM C1528 Standard Guide for Selection of Dimension Stone, ASTM International.
- TCNA Handbook for Ceramic, Glass, and Stone Tile Installation, Tile Council of North America.
- Natural Stone Tiling Technical Guidance, Stone Federation Great Britain.
- ANSI A108/A118/A136 Installation Standards, Tile Council of North America.