White Marble Shower Wall Lighting: Approve Slabs Before the Wet-Zone Mock-Up
I rejected a shower-wall batch after the factory had already put the first three slabs on the dry-lay rack. The sample looked cool white. Under the 3000K fittings intended for the hotel, the field turned cream and one grey vein looked almost green beside the niche. The architect said the photos were fine. I said, “Don’t just look at samples.” We re-lit the rack. Lighting lies.

A white marble shower wall is a full-slab decision, not a tile-swatch decision. The stone sees steam, hard water, reflected light, shadow from the shower glass, and a dozen cuts that can turn one graceful vein into visual noise. That slab doesn’t belong next to your bathtub if its strongest break lands directly through the control valve.
Read the slab before you draw the shower
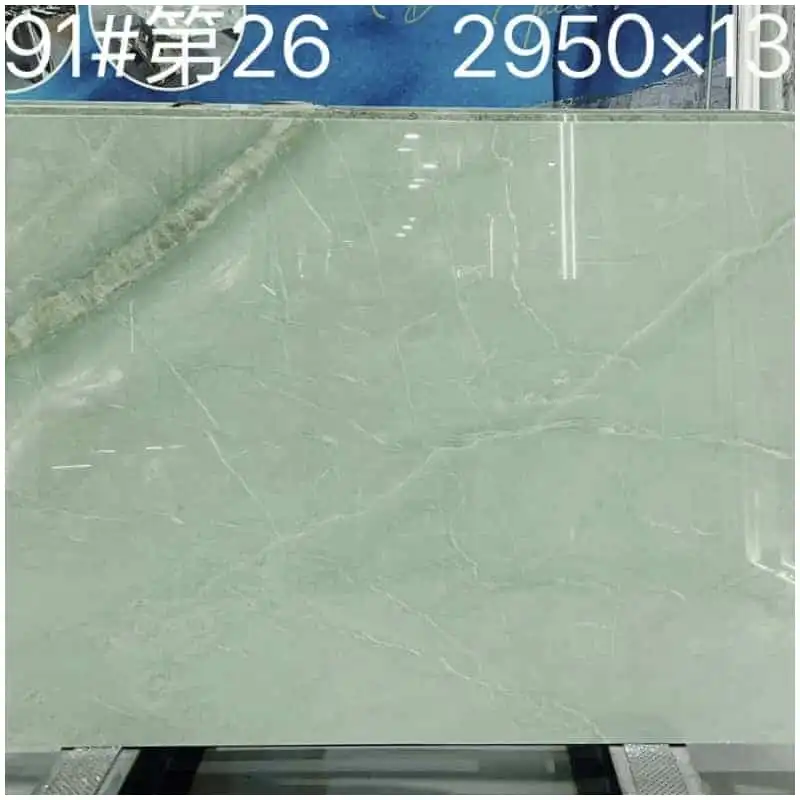
Start with the elevation: shower head, niche, mixer, glass channel, floor line, and the most visible eye-level field. Then place the actual slab photograph beside it. A small Calacatta sample may show one restrained grey thread; its full slab can carry a bold diagonal that changes direction every 600 mm.
For projects needing a more active movement, Calacatta white marble deserves a full-slab layout rather than a vague “match veins” note. I want arrows on every piece and a named reference edge. That is how a corner reads intentional instead of accidental.
| Warehouse log item | Pass condition | Failure signal |
|---|---|---|
| 3000K lighting check | Field and adjacent slabs retain the approved undertone | Cream or green shift appears at a joint |
| Dry-lay transition | Vein direction continues across visible joins | A cut makes the vein stop or reverse abruptly |
| Niche location | Cut sits in a quieter part of the slab | A dominant vein is chopped into fragments |
| Finish sample | Cleaning trial leaves no obvious visual surprise | Water residue is highly visible under raking light |
The Hard-Won Lesson: The niche stole the only quiet part of the slab
A villa bath used three matched pieces of Statuario. The contractor moved the niche 70 mm after the dry-lay because of a pipe. Nobody reissued the cut drawing. The revised opening cut through the clean field and left two heavy vein fragments staring at each other. The replacement slab came from a warmer block, so the wall had to be remade.
The Lesson: When a service moves, stop the cutter and re-place the opening on the full slab image.
White marble shower wall lighting reveals what a PDF hides
Lighting lies. I say it twice because people forget it twice. At 4000K, a cool Sivec white marble can look sharp and almost blue. At 3000K, a warmer batch can look softer but more yellow next to chrome. Neither result is a defect if it matches the approved target. The failure is approving under one condition and installing under another.
Polished material reflects more. Honed material may hide glare, but it can deepen after water touches it. We do not promise a wet zone will behave like a dry lobby. We test the finish, grout color, and sealer system in the mock-up. Don’t just look at samples.
Inspect corners, not only centre panels
Most people admire the central wall first. I walk to the glass edge, the niche return, and the top line where the ceiling light grazes the surface. That is where a natural fissure catches dirt, a vein changes its direction, or a mitred return exposes a warmer interior. The centre panel gets the photographs. The corners get the complaints.

A full-height layout needs an agreed joint map. I prefer joints that sit with the composition rather than against it, with the same nominal width from floor to ceiling. In a steam-prone room, the waterproofing system and movement joints still matter. Marble is the visible finish; it cannot repair a wall that moves behind it. That slab doesn’t belong next to your bathtub if the installation system has no answer for water management.
We also record the expected cleaning products. Acidic cleaners can alter polished calcite surfaces, and abrasive pads can change a local sheen. That is not a scare story. It is a reason to hand over a simple care note with the room samples. Lighting lies, but uneven cleaning makes the lie much louder.
The glass, grout, and drain are part of the visual approval
People keep approving marble against a white wall in a warehouse and then act surprised when the installed shower has black hardware, a smoked glass screen, and a pale grout line crossing the field. I ask to see those neighbours. A cool grey vein can look controlled next to a charcoal profile, then look green when the glass catches warm light. The grout can make a joint disappear or make every panel look smaller. There is no safe default colour for every white.
Floor drainage deserves the same attention. A linear drain may create a calm horizontal line beneath a full-height wall, while a central drain can force more cuts in the floor field. If the wall marble turns at the shower base, decide where the vertical vein stops and where the floor pattern begins. A rushed transition looks like two unrelated materials met by accident. That slab doesn’t belong next to your bathtub when the detail beneath it cannot drain or clean properly.
For a hotel, I keep one approved sample board in the mock-up room after the dry-lay has been signed. It holds the grout, sealant, metal, glass, and a small offcut from the installed batch. When a question appears later, we compare against the room reality rather than a phone photo from a different month. Don’t just look at samples. Look at the exact surrounding conditions.
Treat repairs as a design decision, not a hidden trade fix
Natural marble can have open veins, small fissures, and filled areas. Some are acceptable, some are not, and the boundary must be agreed before pieces are cut. I mark anything that might be questioned on the full-slab image, then decide whether it belongs in a low-visibility return, a feature area, or outside the project. That direct conversation is far cheaper than a site argument after a wall has been installed.
If a piece chips during installation, do not let a repair team choose a colour by guesswork under temporary site lights. Photograph the location, preserve any fragment, and compare it under the final fitting. Lighting lies even during repairs. The best repair may be quiet; it will never be invisible if the original selection and transition were already wrong.
Before sign-off, return to the room after the sealant has cured and the glass is fitted. Steam, reflection, and a closed shower door create a different view from an open mock-up. Check the lower corners, niche shelf, and the panel beside the mixer again. I have seen a good dry-lay become visually busy only after the metal trim and glass started reflecting into the marble. That final walk does not replace planning. It confirms the planning survived installation.
Write down any accepted repair, finish variation, or joint adjustment before the next room starts. Otherwise the same argument returns with a different face. I prefer a blunt record to a polished excuse.
Understanding wet-zone marble approval in today’s white marble market
What belongs in the approval record
Keep full-slab photos, numbered dry-lay photos, a lighting note, finish approval, and the cut drawing together. The Complete Project Guide to Premium White Marble Selection and Quality Control follows the same discipline: the stone cannot defend itself after a vague approval.
What to do when a mismatch appears on site
First photograph the wall under the installed light, including a wider view and close joint view. Second stop the affected installation. Third send the images with the approved dry-lay and slab records to the supplier. Do not hide the issue with a darker grout. That only gives you two problems.
Frequently asked questions
1. Is a white marble shower wall suitable for a hotel bathroom?
It can be, when the project accepts natural variation and approves the finish, sealing, cleaning routine, and full-slab layout before fabrication. A mock-up is the honest answer.
2. Which light temperature should be used to approve white marble?
Use the actual specified lighting, then compare under a second condition such as 4000K warehouse light. This exposes undertone changes before the pieces leave the factory.
3. Why are full slab photos better than samples?
They reveal vein scale, fissure locations, color range, and where cuts will fall. A sample is a clue; it is not the whole decision.
4. Should shower niches follow the marble vein?
They should be placed with the vein in mind. A niche can interrupt a strong movement, so mark it on the full slab image before cutting.
5. What should I do first when a shower wall looks different after installation?
Document it under the installed lighting, pause the local work, and compare it with the approved slab and dry-lay record before anyone attempts a repair.
Quick-Reference Checklist for White Marble Shower Walls
- View numbered slabs under the specified bathroom fitting.
- Mark niches and valves on full-slab images.
- Approve dry-lay transitions before cutting.
- Test finish and sealer in a wet mock-up.
- Record the approved batch range in writing.
Final Conclusion
I do not let a clean PDF overrule a full slab under real light. Check the wet-zone mock-up, protect the quiet areas of the stone, and stop when a late service change moves a visible cut. Lighting lies, and Esta Stone would rather reject one wrong layout at the rack than watch it become a permanent argument on site.

References
Dimension Stone Design Manual, Natural Stone Institute.
Natural Stone Care and Maintenance, Natural Stone Institute.
Marble Dimension Stone, ASTM International.
Handbook for Ceramic, Glass, and Stone Tile Installation, Tile Council of North America.
Bathroom Planning Guidelines, National Kitchen and Bath Association.
Technical Guidance on Natural Stone, Stone Federation Great Britain.