

Volakas Marble Window Sills: Vein Direction, Drip Edges, Returns, and Light Control
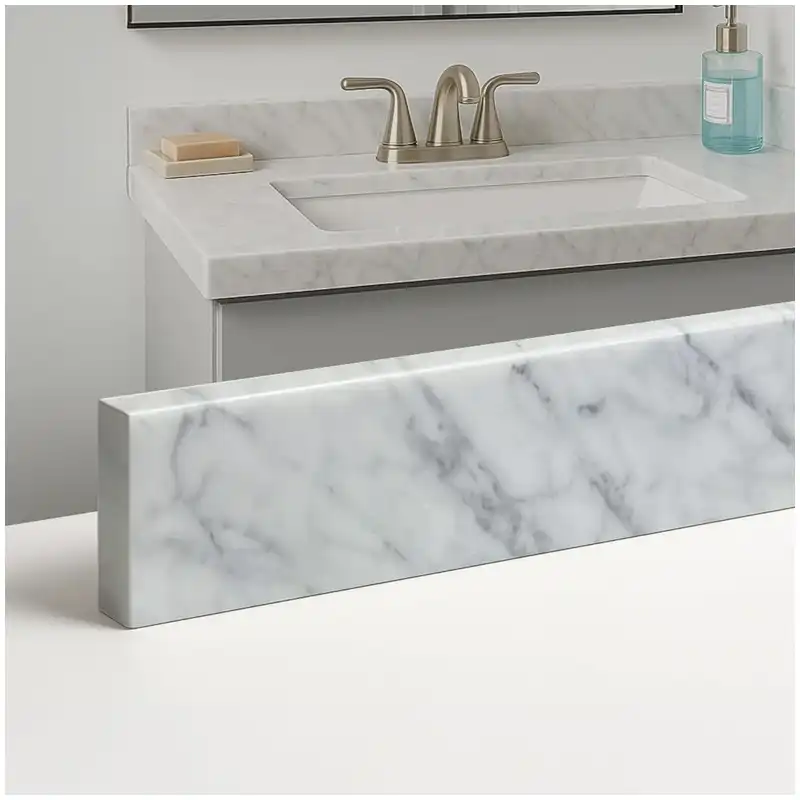
I rejected a batch of narrow white-marble pieces labeled “sills” because the team assumed they would blend in. Under warehouse lighting, they appeared consistent. Installed side by side at the window, the grey veins read as three unrelated pieces. One pointed toward the shower, another stopped dead at the return, and a third carried a warm patch beneath the glass. None of them was large, and the failure sat entirely in the opening.

What that batch taught me is that a Volakas marble window sill is a wall component with a window above it, not an offcut. The sill, the jamb returns, the wall panels, the grout lines, and the daylight all meet in one high-visibility zone. Relying on small samples is insufficient. Hand-sized specimens obscure the vein direction and background tonal shifts that emerge when natural light illuminates the complete opening.
Before I authorize a cut, four things need to be fixed: the sill allocated from the approved slab, the returns dry-laid in position, the water-control section agreed, and a photograph of the opening taken from inside the room. Lighting conditions distort perception near windows. A neutral white slab may exhibit cooler blue-grey tones in daylight versus warmer hues under evening bathroom lamps.
Prioritize Opening Integration Over Offcut Availability
A window sill interrupts the vertical flow of stone cladding. It either extends the wall’s visual rhythm, frames the exterior view, or bisects the elevation. Before authorizing factory cuts from residual strips, I position the proposed sill adjacent to the wall allocation. The primary concern is not whiteness but whether the grey vein pattern logically connects with the surrounding stonework.
Volakas marble window sills often read more calmly when prominent diagonal veins avoid short returns. Compressing complex veining into 100 mm or 150 mm edges resembles damage instead of organic movement. Selecting a quieter field for the horizontal sill allows expressive slab portions to remain on the wall. This approach represents strategic slab editing rather than material waste.
Label the viewing face and installation orientation on every component. Sills can be reversed during packing or setup. Rotation disconnects the vein pattern from the jamb or wall panel, leaving installers without sufficient spare material for correction. Cutting lists must include directional arrows, panel codes, and explicit room or opening references.
Maintain Sill and Return Cohesion
Wide openings comprise sills, jamb returns, and head details converging under direct illumination. Assemble these components during dry-lay. Avoid approving the sill face independently while instructing the factory to match sides subsequently. Returns can carry a different background tone, a different finish reaction, or a different vein orientation, so I approve the sill and its two returns as one unit or send all three back to the slab.
A bathroom window return may meet several different materials within a short distance: tile, waterproofing membrane and metal frame. Where a marble return butts an irregular frame, the joint width varies down the reveal. That variation can hold water and dirt along an uneven line and make the joint harder to keep clean, although its contribution to staining depends on the sealant, the drainage path and how the assembly is maintained. Controlled reveals offer superior cleanliness. Project specifications must define this choice prior to fabrication, as finished narrow pieces cannot rectify ambiguous wall conditions.
Avoid Misallocating Premium Slab Edges
Factories reach for the most attractive offcut to keep yield high, and this can make sill selection go wrong. A piece that would enrich a tall wall panel becomes a visual interruption once it sits under glass. A warm field or a heavy grey branch pulls the eye down to the window band instead of letting the wall read as one surface. My rule is that the opening comes first and the offcut second. A dramatic piece does not earn a place under a window simply because it is expensive, and a slab that suits one bathtub wall can be the wrong choice for the next one.
Implement Functional Water Management Details
Dry interior openings accumulate condensation, cleaning residue, and dust. Bathroom sills near showers, operable windows, or tiled reveals receive directed water exposure. Sections must specify finished slopes, edge treatments, frame joints, and drainage paths. A polished white sill gives no early warning of a poor fall; the stain or the tideline at the joint may be the first visible sign, and by then the edge and the fall are already fixed.
A marble sill drip edge is not a decorative groove copied from an exterior facade. Its profile, position, and need depend on the assembly. The key point is that water should not run back under a projecting edge or remain trapped at a frame joint. If the sill projects into the room, check whether the underside and wall finish can be cleaned after the first wet cycle. If it sits nearly flush, check whether the frame and sealant detail can tolerate the movement and cleaning method.
Don’t just look at samples when approving the fall. A small coupon lies flat on a bench. The completed sill needs to be placed at its intended angle and wiped with water. That simple test can reveal a high back edge, a rough polish line, or a joint that holds water. I want to see the real section before the same detail reaches ten rooms.
Polished edges show every correction
Volakas can look soft and almost cloudy on a broad polished face. At a narrow exposed edge, however, a resin line, filled pinhole, or uneven polish can become obvious. The edge is close to the eye and often catches low side light from the window. Inspect it from the room side, not only from above. A repair that is acceptable on the back of a wall panel may be unacceptable on a sill edge that carries direct light.
When the selected Volakas Marble Slab has a visible grey branch near the proposed front edge, decide whether that movement belongs there before cutting. It can add character to a larger window opening. In a small bathroom, it may make the sill feel heavier than the wall. The slab photo is useful. The full dry-lay is the evidence.
Joints need a cleaning plan
Frame sealant, grout, and stone joints each age differently. If the joint at the rear of the sill is too deep, it can collect dust and moisture. If it is too tight against a moving frame, it can crack or stain. The project should specify compatible materials and a neat joint depth, then show that condition in the mock-up. Do not hide an uncertain joint behind a thick white bead and call it finished.
Read daylight and bathroom light separately
A sill has two lives: one in daylight and one under the room’s installed lighting. Daylight can make the white background feel cooler, while lamps with a lower correlated colour temperature may draw a warmer note from the same stone. Under lamps with a higher colour temperature, grey branches can read sharper and more blue. The exact shift depends on the slab and surrounding materials, which is why I do not promise a colour from a screen image.
Volakas marble window sills should be checked in the opening with the window uncovered, then with the planned bathroom lighting on. Stand at the door, at the vanity, and beside the shower. A sill that looks quiet from the doorway can become a dark horizontal break in the mirror reflection. A return that disappears in daylight can show up as a warm patch under a wall light. One lamp over a bench proves nothing about the opening, which is why I read both conditions before the piece is approved.
Use the same lighting review for the wall panels. Volakas Marble Slab Approval Beyond the Small Sample helps keep the broad slab selection honest, while the sill review deals with the small, high-contrast pieces that can undo a good wall allocation at the final stage.
Use dry-lay before narrow pieces disappear into crates
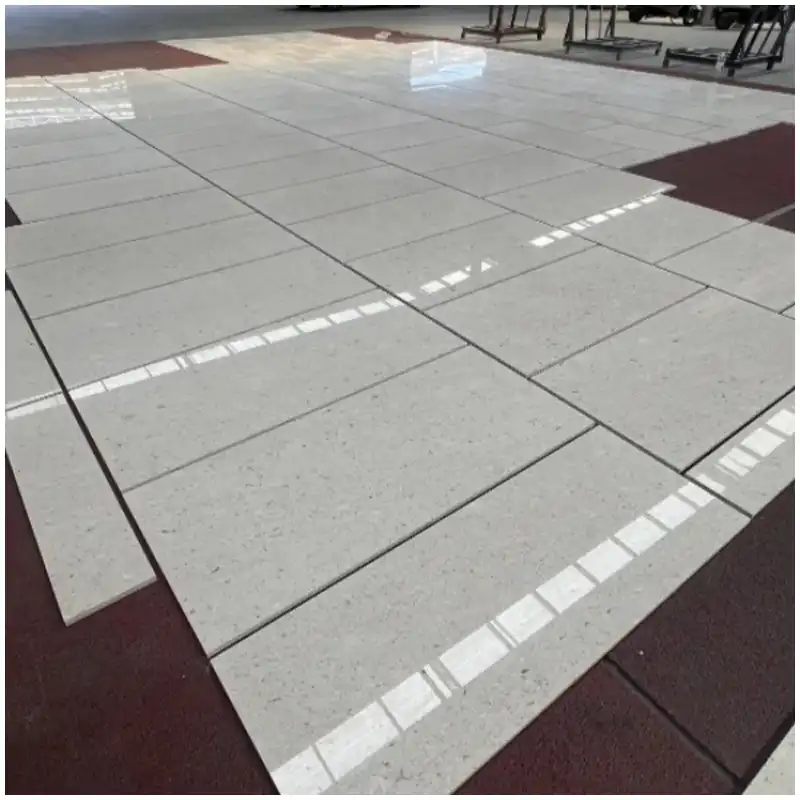
Lay the sill, returns, and adjacent wall pieces at the factory in the same orientation they will have on site. Include the opening dimensions and a simple frame template where the profile matters. Photograph the assembled condition with panel codes visible. I do not need a staged display. I need evidence that the grey lines, returns, and joints have been seen before packing.
Volakas marble window sills must remain identified through packing. Put the opening code, orientation arrow, and room number on the back or protected edge as the project requires. Keep returns close to their sill in the crate manifest. An installer should not have to open four crates to find the two small pieces that make one window work.
When a project has several similar windows, distinguish the ones that are only similar from the ones that are genuinely interchangeable. A repeated size may still belong to a different vein sequence or room type. This is where Volakas Marble Tile Sorting: Floor and Wall Guide 2026 becomes useful: sorting protects the visible range, but each opening still needs its own allocation record.
What the sill approval table must settle
| Condition | What to inspect | What goes wrong when it is missed |
|---|---|---|
| Vein allocation | Sill and returns beside adjacent wall pieces | An opening that cuts against the wall’s movement |
| Water route | Finished fall, front edge, frame joint, and underside | Standing water, back-run staining, or a dirty joint |
| Acabamento da borda | Polish, fills, resin lines, and exposed arris | Visible repairs under direct window light |
| Lighting | Daylight, installed room light, and the review light | Unexpected cool or warm patches after installation |
| Piece identity | Opening code, room code, and orientation arrow | Returns rotated or installed at the wrong window |
The Hard-Won Lesson: Never approve a sill without its returns
A white-marble sill can match the approved slab and still fail at the opening when the short return pieces arrive from another part of the same bundle. The wall may be cool white, the sill may be quiet grey, and the return may suddenly carry a warm field under daylight. The individual pieces are plausible. Their meeting is wrong.
The Lesson: Dry-lay every visible sill with both returns before you let any narrow piece enter the crate.
When a window detail needs to stop
The frame arrives outside the approved tolerance
Photograph the frame and opening with a readable scale, pause the affected sill installation, and compare the site condition with the signed section. Do not grind a visible marble edge to hide a frame error. The finished joint, fall, and return need a revised decision.

Volakas marble window sills need that decision before a polished front edge is altered on site, because the correction can change both water control and the visible vein line.
A vein or repair appears at the exposed edge
Keep the panel code in the photograph, stop packing that piece, and compare it with the approved dry-lay image. The correct response may be a reallocation, a replacement, or a revised location. Do not assume a repair acceptable on a hidden face is acceptable where daylight will find it.
For Volakas marble window sills, that record protects the opening from receiving a plausible substitute whose undertone belongs somewhere else.
Cleaning water marks the first installed sill
Document the cleaning product, water route, joint condition, and installed light before any treatment is applied. Then compare the condition with Volakas Marble Maintenance Samples so the project tests a measured cleaning response rather than spreading a random product across completed rooms.
Questions teams ask before cutting window sills
1. How should Volakas marble window sills be allocated from a slab?
Allocate them with their jamb returns and adjacent wall pieces visible. Mark the face direction and opening code. Choose a calmer or more expressive portion of the slab deliberately rather than using whichever narrow offcut is left.
2. Do bathroom marble sills need a fall?
The required detail depends on the opening, frame, water exposure, and project design. The finished section must show how water avoids sitting at the rear joint or running underneath a projecting edge. Test the actual mock-up with water.
3. Why does Volakas look different beside a window?
Daylight changes the apparent coolness and contrast of white marble. Warm room lighting can reveal a different undertone later. Review the actual sill and returns in both conditions before final approval.
4. Can a filled edge be used on a marble sill?
Only after the project reviews the visible edge under intended light and accepts the repair condition for that location. A feature hidden on a wall back can be obvious on a polished horizontal edge.
5. What should happen when the sill does not fit the installed frame?
Photograph the issue, stop installation, and send the image with the signed opening section, dry-lay record, and inspection photos to the responsible team. Do not cut or force the stone until the frame, joint, fall, and return conditions are reviewed together.
Quick-Reference Checklist for Volakas marble window sills
- Allocate each sill and return from the signed slab dry-lay.
- Mark viewing face, opening code, and installed direction on every piece.
- Check the finished fall and frame joint with water before release.
- Inspect polished edges under daylight and installed room lighting.
- Keep returns with their sill in the packing and installation sequence.
- Stop fitting when the installed frame changes the approved section.
Keep the actual surface route in Volakas marble slab. Face direction and reserved blocks are recorded there before any window piece is cut.
The technical detail is carried by Volakas Marble Slab Approval. The dry-lay images and the signed approval sheet are what the factory actually cuts against.
For the next approval decision, compare Volakas Marble Batch Matching. The next window in the same elevation still has to come from the same vein sequence.
The broader room record is Volakas Marble Shower Walls. Water management, the wall panels, and the sill detail are one decision for the whole elevation, not three separate ones.
Final Conclusion
Volakas marble window sills belong to the wall and the window at the same time, so they need slab allocation, a true water detail, real lighting, and matched returns before cutting. A dry-lay in the opening and a water test count for more than any single sample. I would rather reject one tempting offcut than fit a sill that breaks a wall we already approved. At Esta Stone, that is how we keep a small horizontal piece from becoming the first thing everyone notices.
Referências
- Mármore, Wikipedia.
- Natural Stone Institute Dimension Stone Design Manual, Natural Stone Institute.
- ASTM C503 Standard Specification for Marble Dimension Stone, ASTM International.
- Stone Federation Great Britain Technical Guidance, Stone Federation Great Britain.
- Tile Council of North America Handbook, Tile Council of North America.
- Search Essentials, Google Search Central.